Steps to change Dashboard Settings
Dashboard Settings allows a user to change the settings of the Dashboard from the list of Dashboards.
For Dashboard Settings, follow the steps below:
-
Click on
 the Component icon from the top right corner menu, a list of the available component will open up as follows:
- Click on Component Icon from the list of the component into the dashboard, a configuration box would open as follows:
-
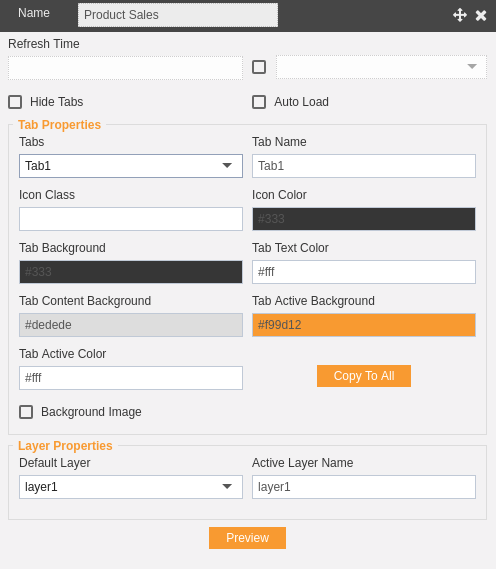
There are different option to customize dashboard below are a few options.
- In Name Option, dashboard name can be changed as desired.
- In Refresh Option, dashboard would be refreshed every time at selected interval.
- In the Background Color Option, the dashboard background color can be changed as desired.
- In Hide Tabs Option, dashboard tabs can be hidden.
- In Auto Load Option, dashboard can be loaded automatically.
- In Background Image Option, background image can be added to dashboard.
- Select Default tab from the dropdown, tab background, tab text color, tab content background, tab active background and tab active color.
- Copy to all means, these settings will be applied to all the tabs of the current layer.
- The user can select Default and Active Layer from the Layer properties
- Click on
 button to see changes.