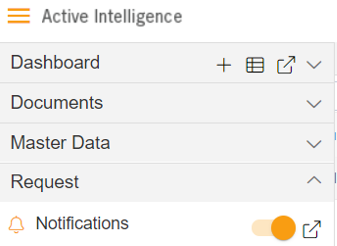
Notification – Request Approval
• This document is all about how to use the Approval Function in AIV. This feature is used
when a user schedules the report using the once or recurring option with Approval Required.
The user can send the approval request to the internal user who is using AIV.
Use Case: user schedules the report using once or recurring & approval required & demo user
approves the request.
NOTE: User approval will not be used with once frequency type.
1. log in to the AIV application with your credentials & go to the Report section.
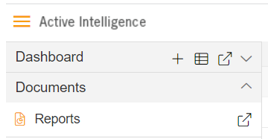
2. Select the report of which you wish to schedule using approval.
3. Double click on the report and the user will be able to see the schedule window.
4. Go to the Schedule tab & click on Once as shown in the image below:
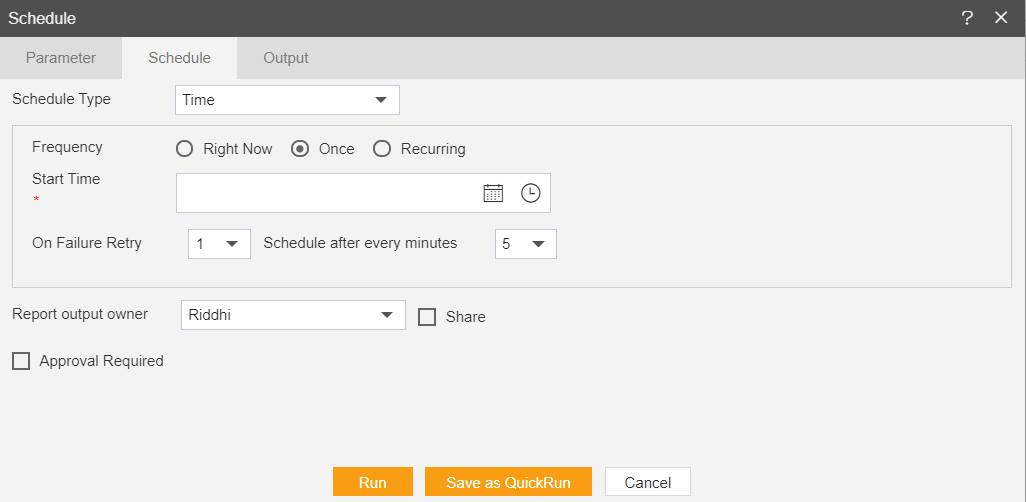
5. Check the Approval Required checkbox. Then the user will see the options as per the below
image:
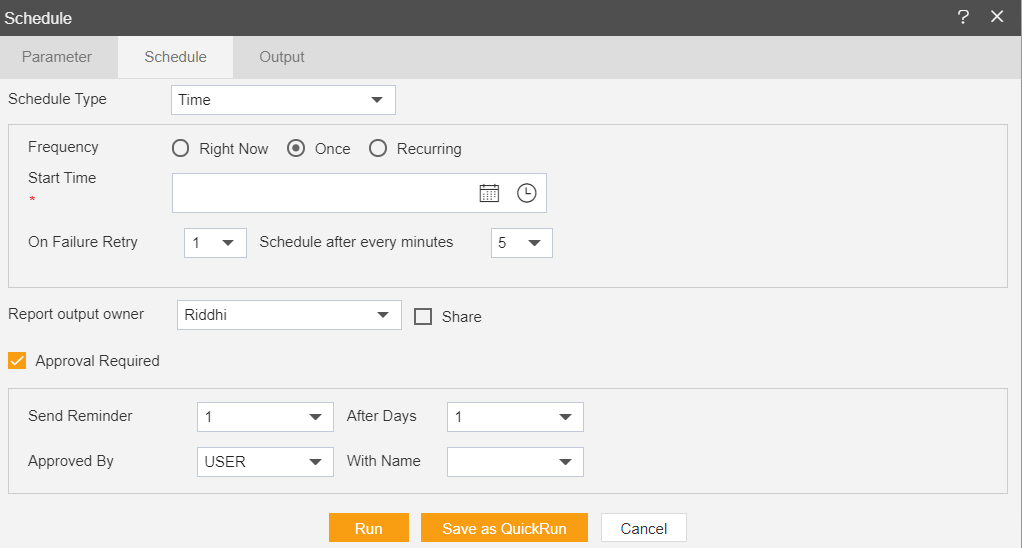
6. Send Reminder: By this user can set the number that how many times the requested user
have a reminder in case when report is not approved same day.
7. After Days: By this option, the user can set the number, that after how many days they
want to send reminder again. (After the selected days the reminder goes automatically)
8. Approved By: By this option user can select approval type, it has 2 options, by user and
by Group of users.
9. With Name: With this option, users can select the name from whom they want approval for
the execution of the report.
10. For Example; a user sends the approval request to the Demo user & schedules report using
Once & Approval Required is checked as shown below:
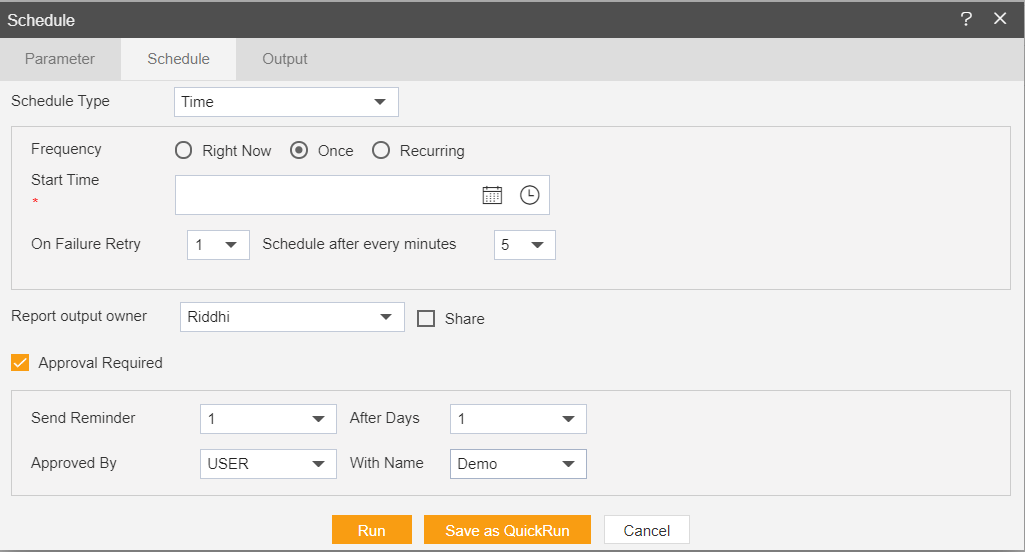
11. Click on the Run button.
12. The Demo user will get an Approval message instantly & it will pop up at the top right
corner of the screen as below:

13. When the Demo user clicks on that pop-up message it will open the Approval section
automatically:
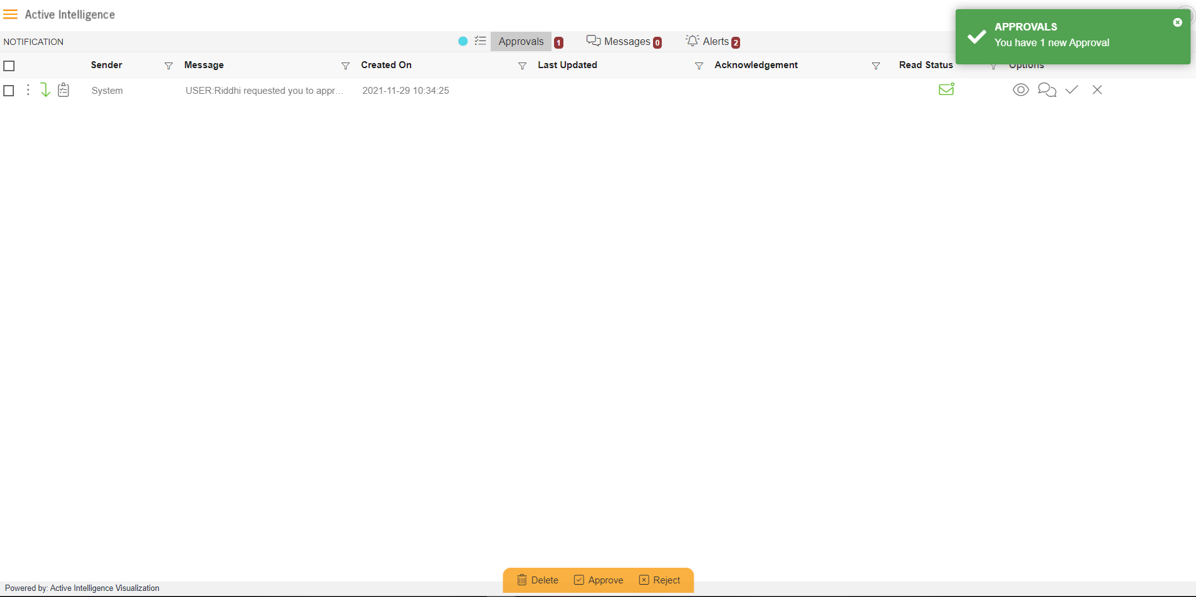
14. Demo user will see a request for approval at the top.
15. For that Approval Demo user can do the operations as given below:
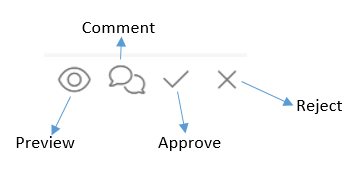
• Preview: By clicking on this option Demo user can preview the report. When the Demo user
clicks the preview icon it will open the report in another tab of the browser.
• Comment: By this option, the Demo user can add the required comment to the approval
request. (report scheduler can see the comment from the request section.)
• Approve: By clicking on this option Demo user can approve the request.
• Reject: By clicking on this option Demo user can reject the request for approval.
16. Right-click on the message, the Demo user will see two options:

• Mark As Read: By clicking on this option Demo user can directly change the status of the
approval request without approving it.
• Delete: By clicking on this option Demo user can delete the selected message.
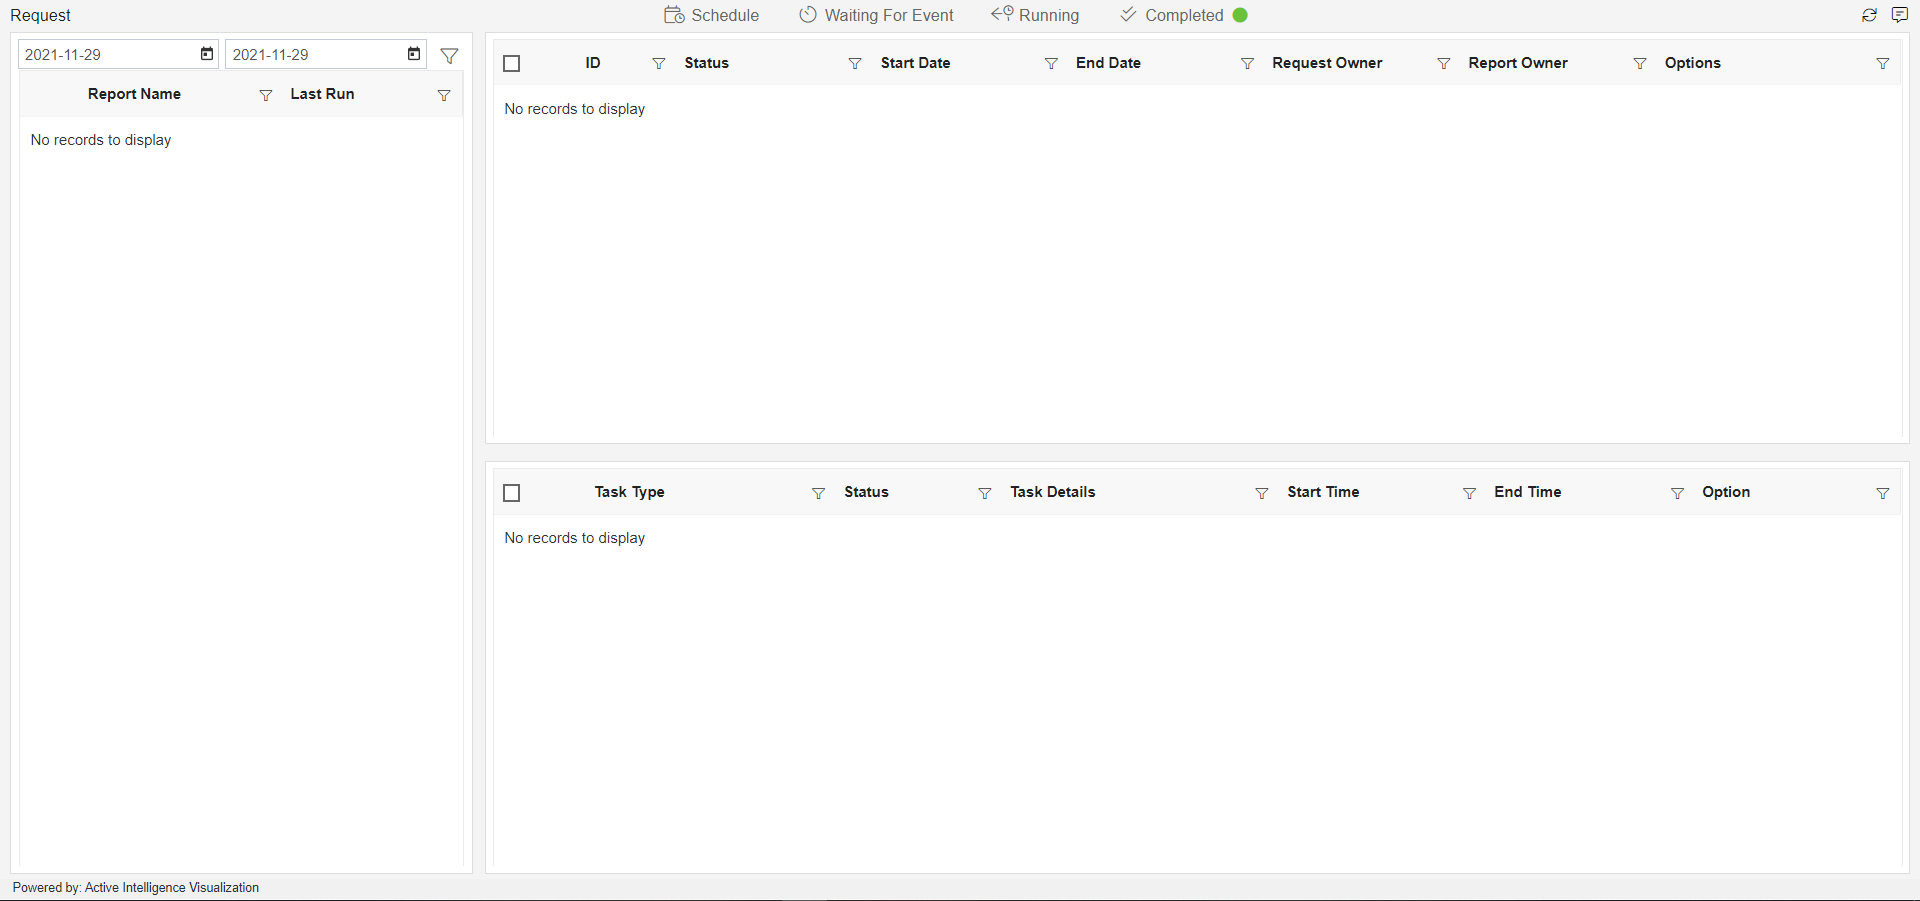
17. Now go to the Request section. (the user who scheduled the report)
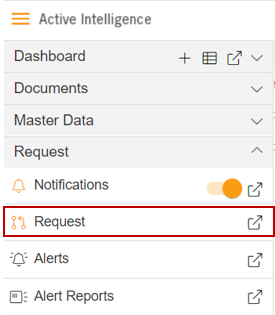
18. The screen will look as per the image below:
19. Go to the Running option from the top of the screen & select Customers Details from the
Report Name, the screen will look as per the image below:
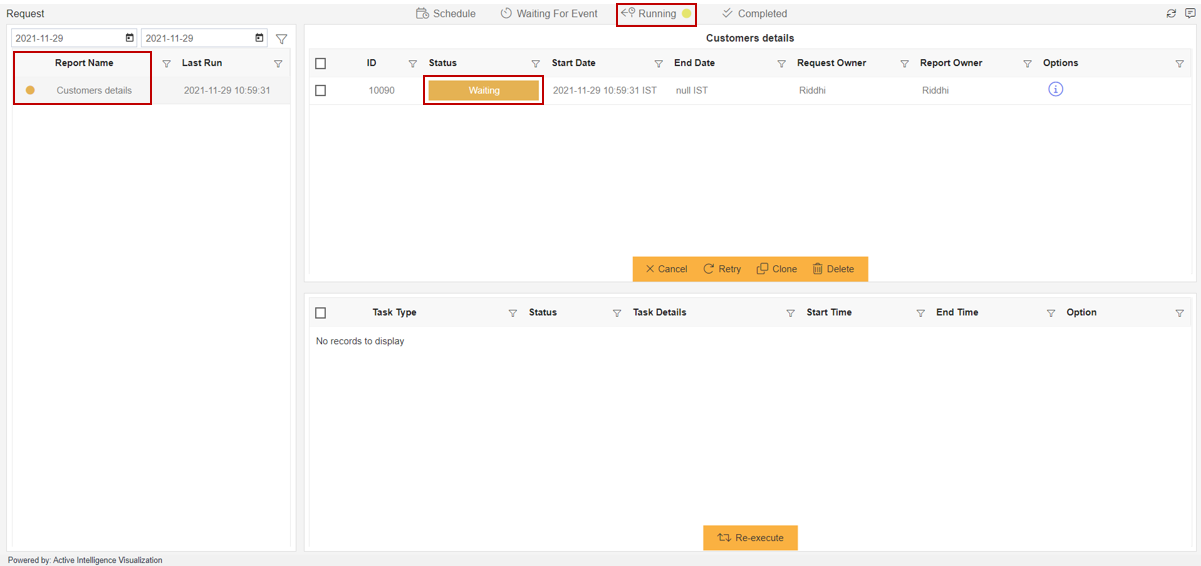
Note: - The Request is in waiting here because the Demo user didn’t approve the report
request yet. Once the Demo user approves the request this request will disappear from the
running option.
20. Now go to the Completed section given right next to running.
21. Click on the Customers Details from the Report Name, then the screen will look as per
below:

Note: - Report status is showing Completed because Demo user approves the report request.
22. Once you click on the completed option your screen will look as per below:
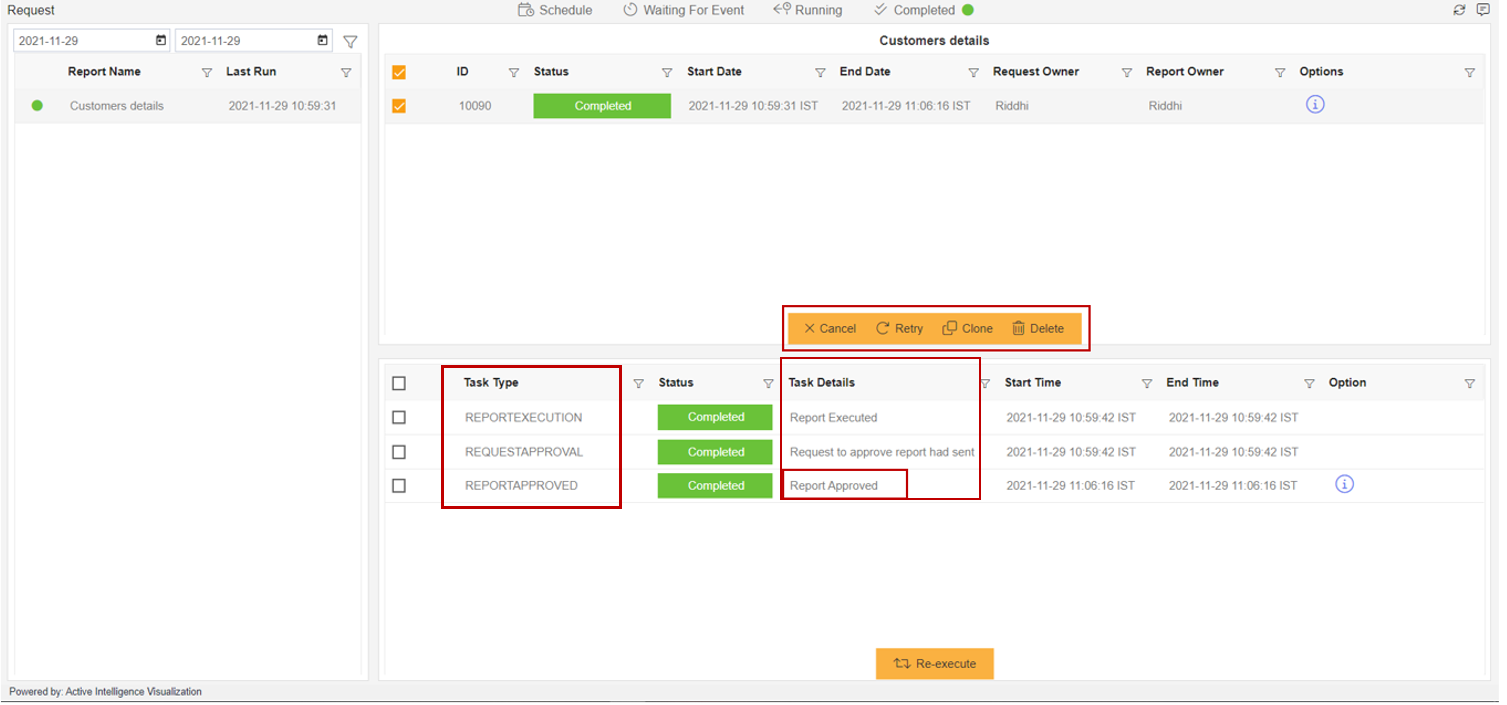
23. User can see the Task Type or Task Details as shown in the image above.
24. By using the options shown below users can make changes to the completed report.

• Cancel: User can’t able to cancel executed requests or other types of requests.
• Retry: To retry the report request or run the request again at once, right now or at a
recurring time with the same user. (if approval was rejected user can again send the request
to the demo user)
• Clone: To schedule the request again with the same or another user.
• Delete: To delete the completed report.
25. User can able to see all activities while report request is running at the Alert option
of the Request section as shown below:
