Create DML Language Alias Dataset
Follow steps to create DML dataset in AIV: -
1. Go to Dataset section, Click on Create DML from bottom menu bar. As shown in figure below:

2. The Create Data Module dialog box looks as shown in figure below:
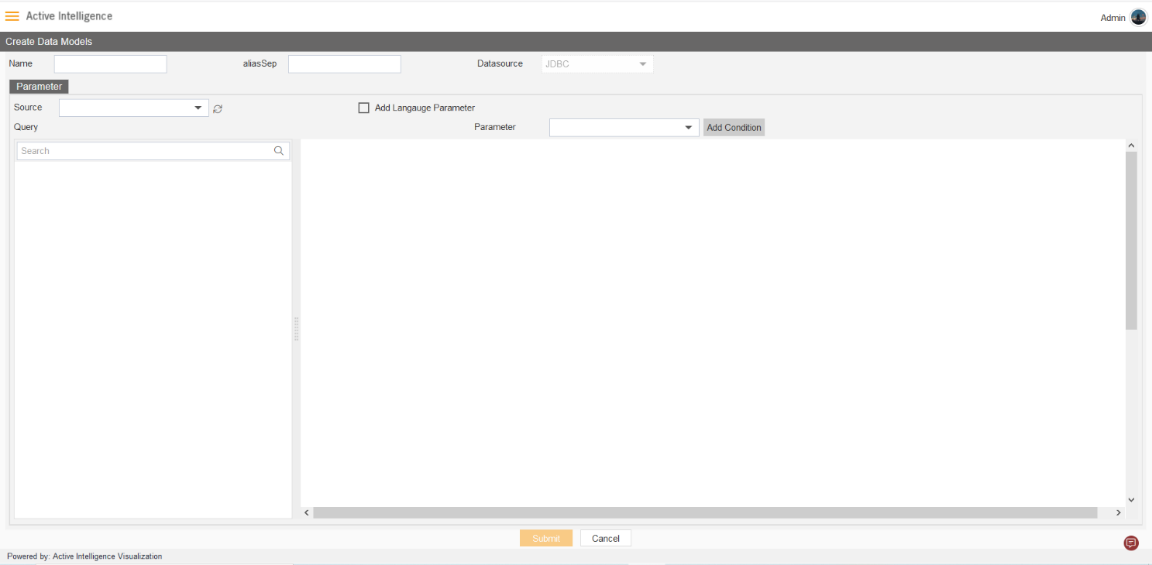
3. Enter Following detail in DML Module dialog box:
Enter name: DML Hindi Alias
Select Source: Training Mapping
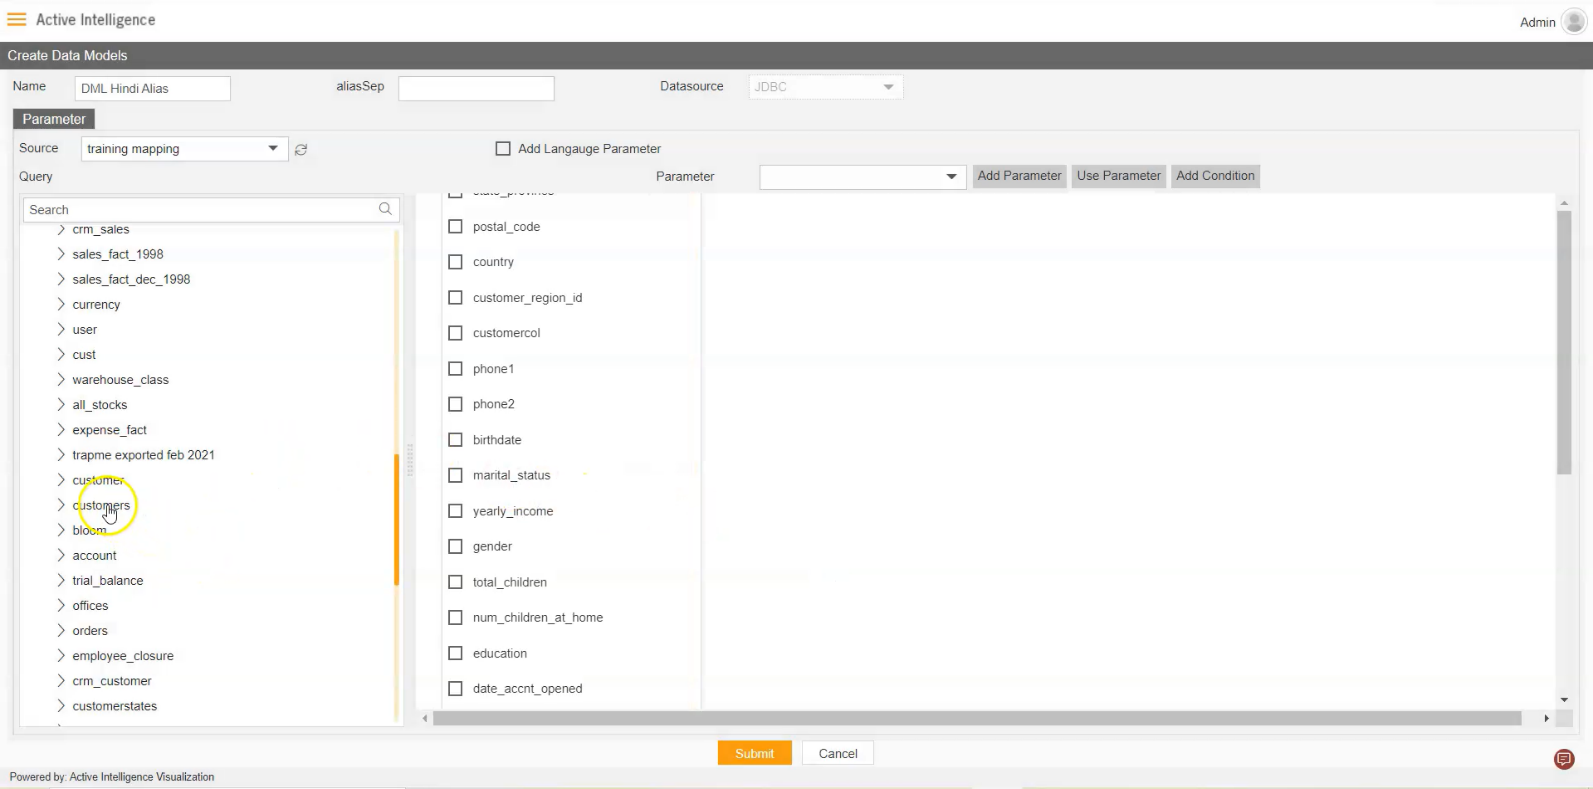
Expend tables from left side table view, As shown in figure below:
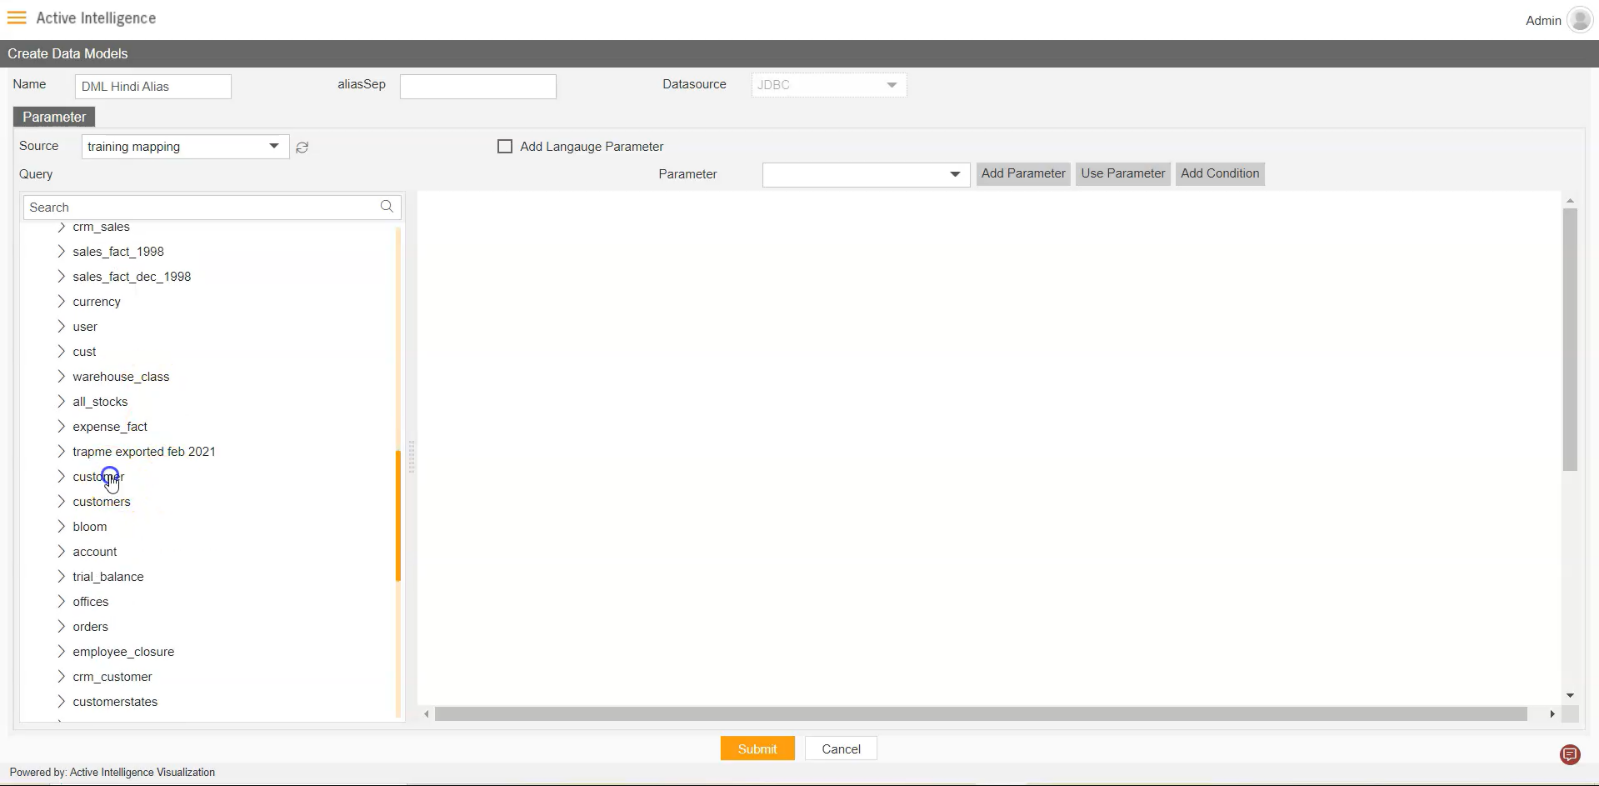
4. Drag and Drop the CUSTOMER table from the table list box to diagram box, as shown in figure below:
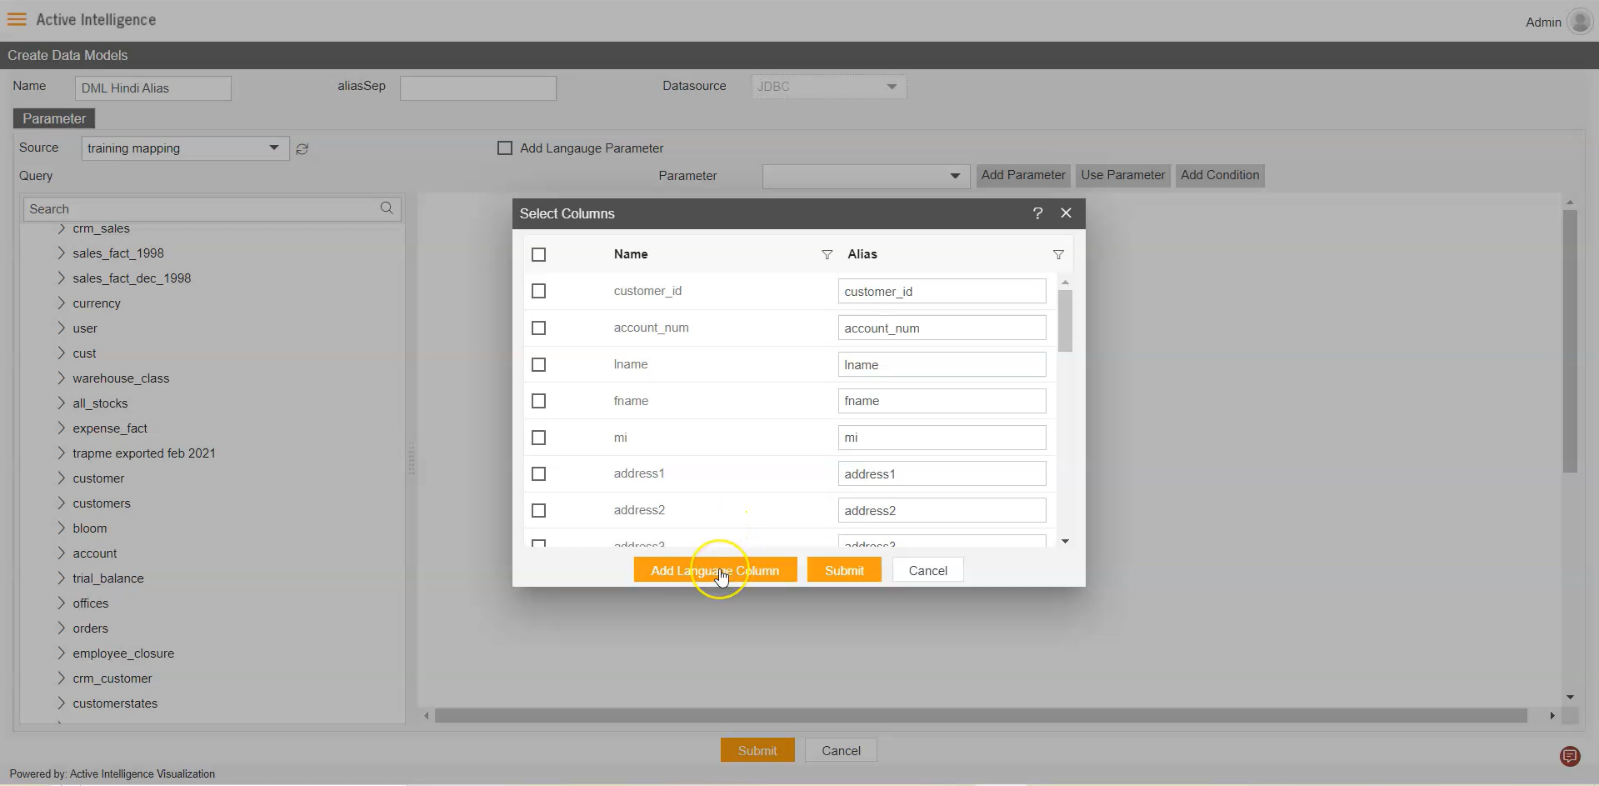
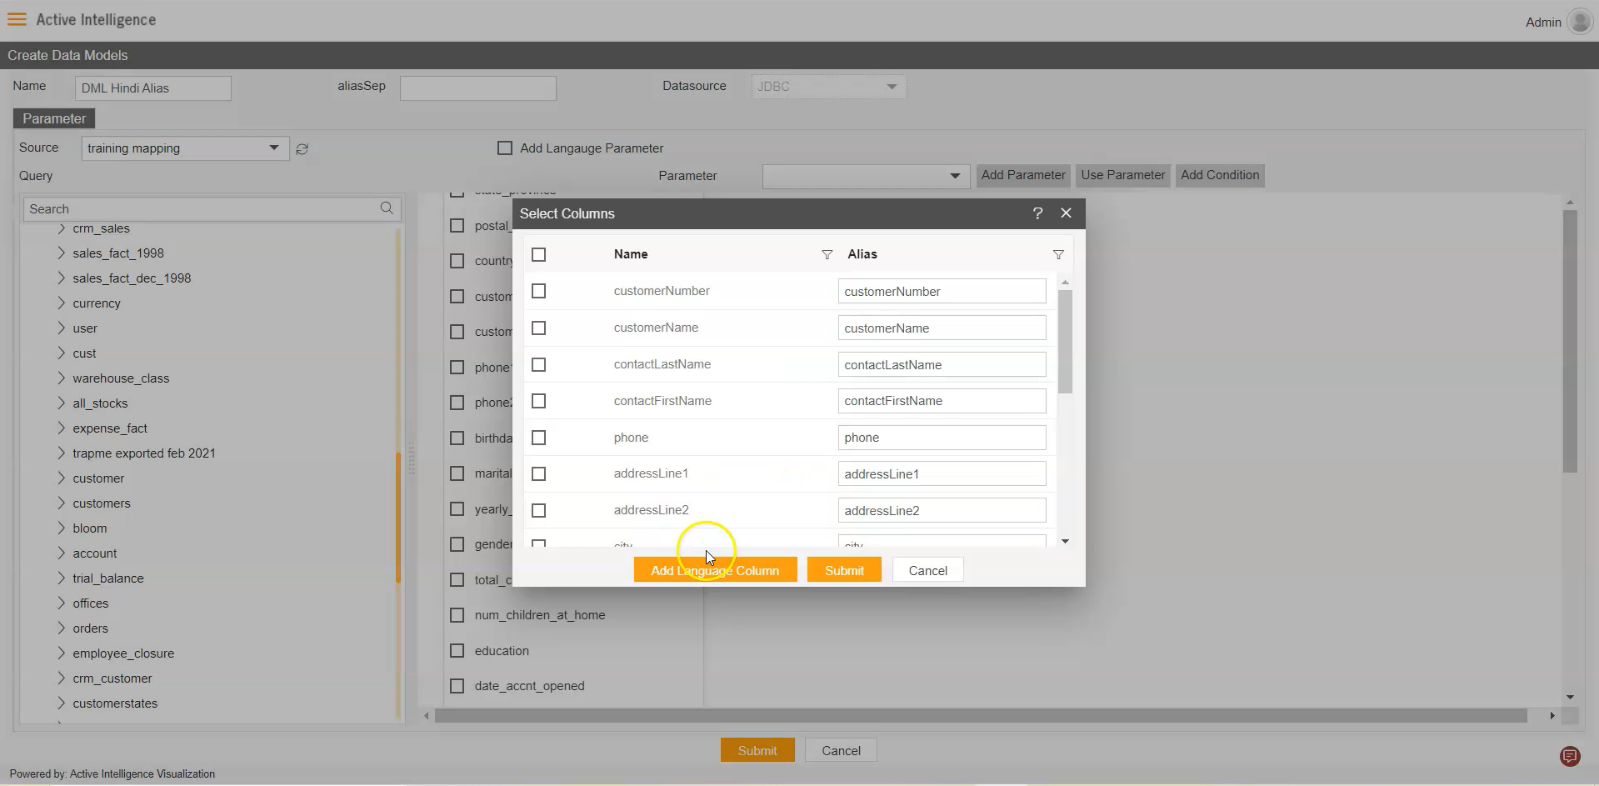
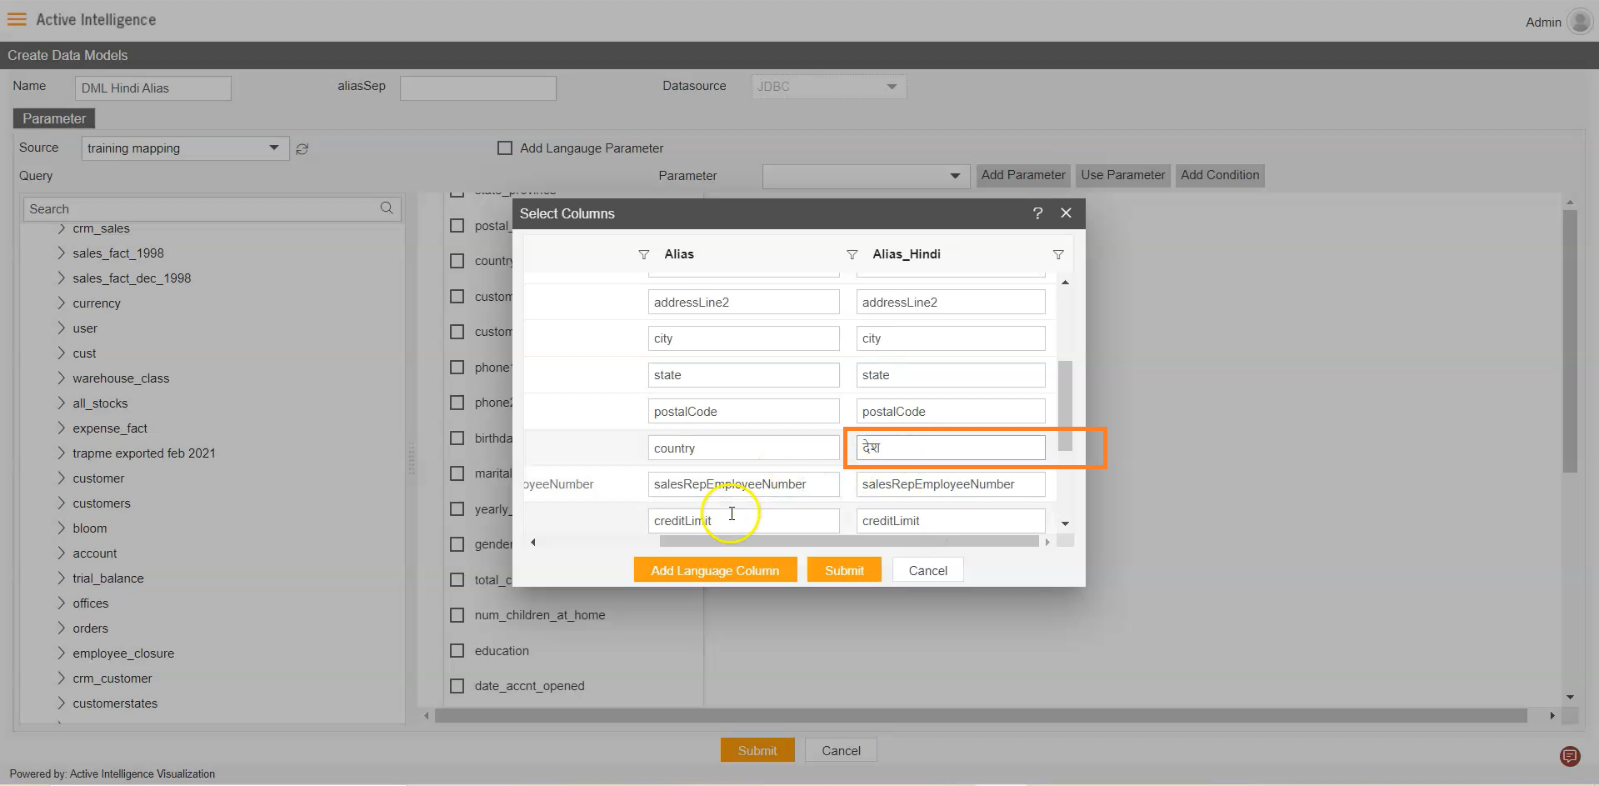
5. To add Alias in Table, click on Add Language Column button, as shown in figure below:
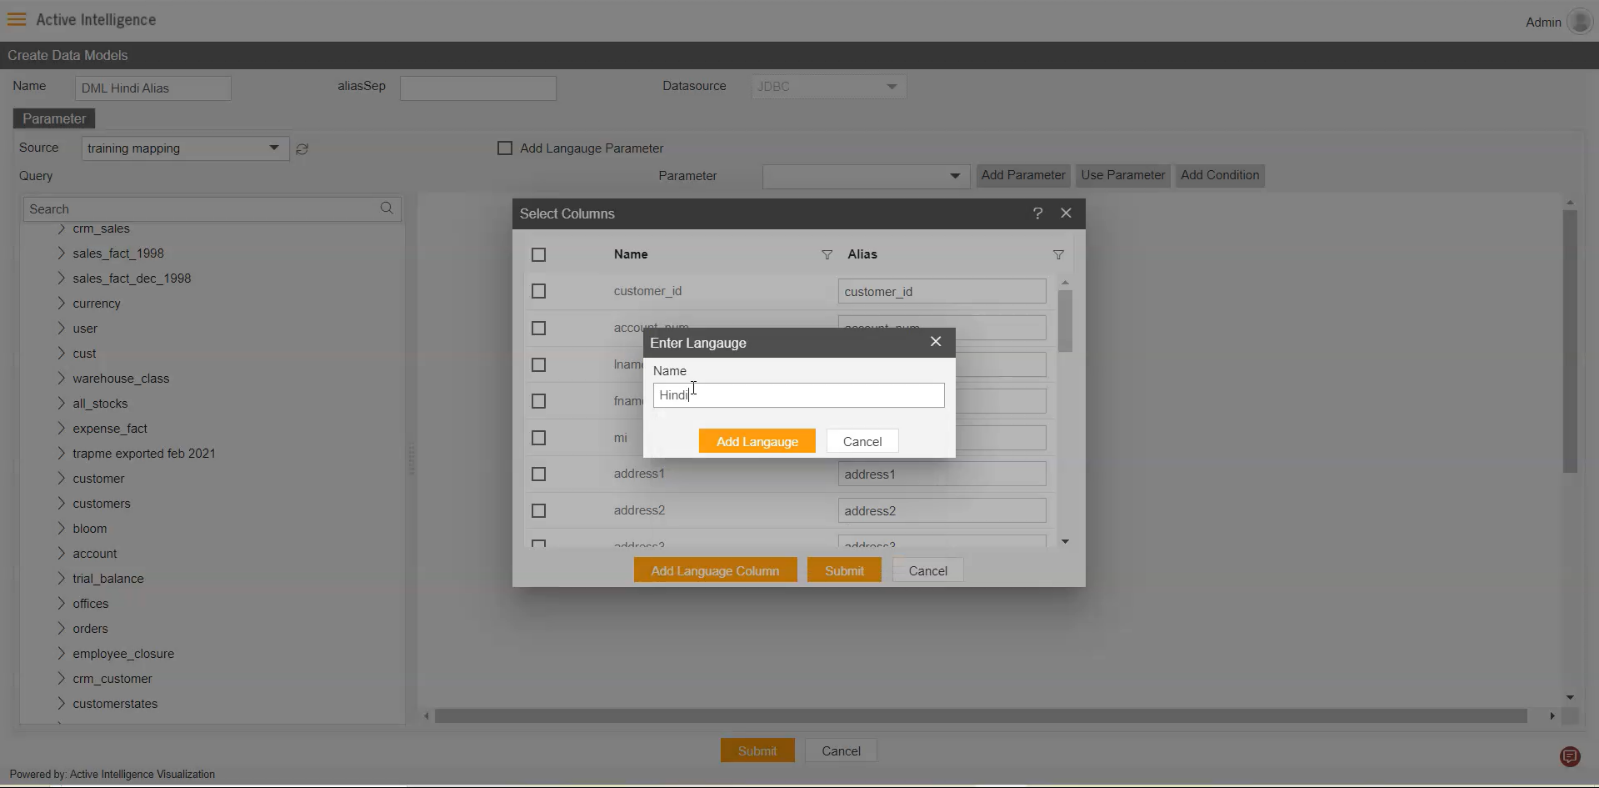
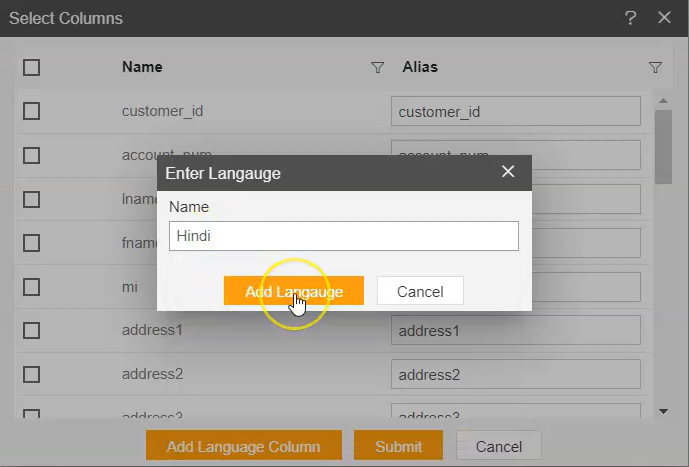
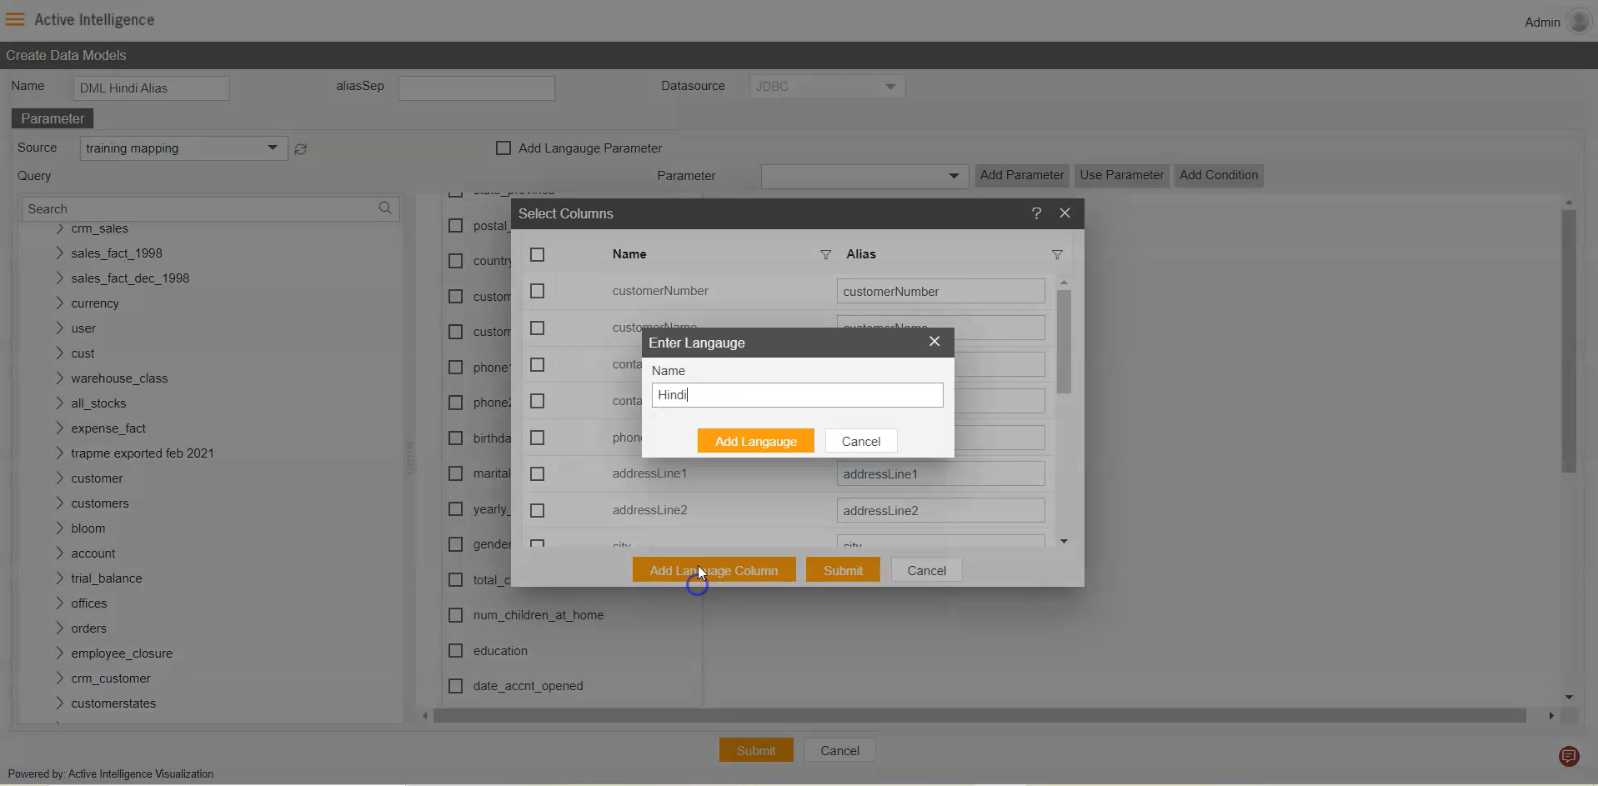
6. Enter name of custom Alias as Hindi, Click on Add Language button. as shown in following figures.
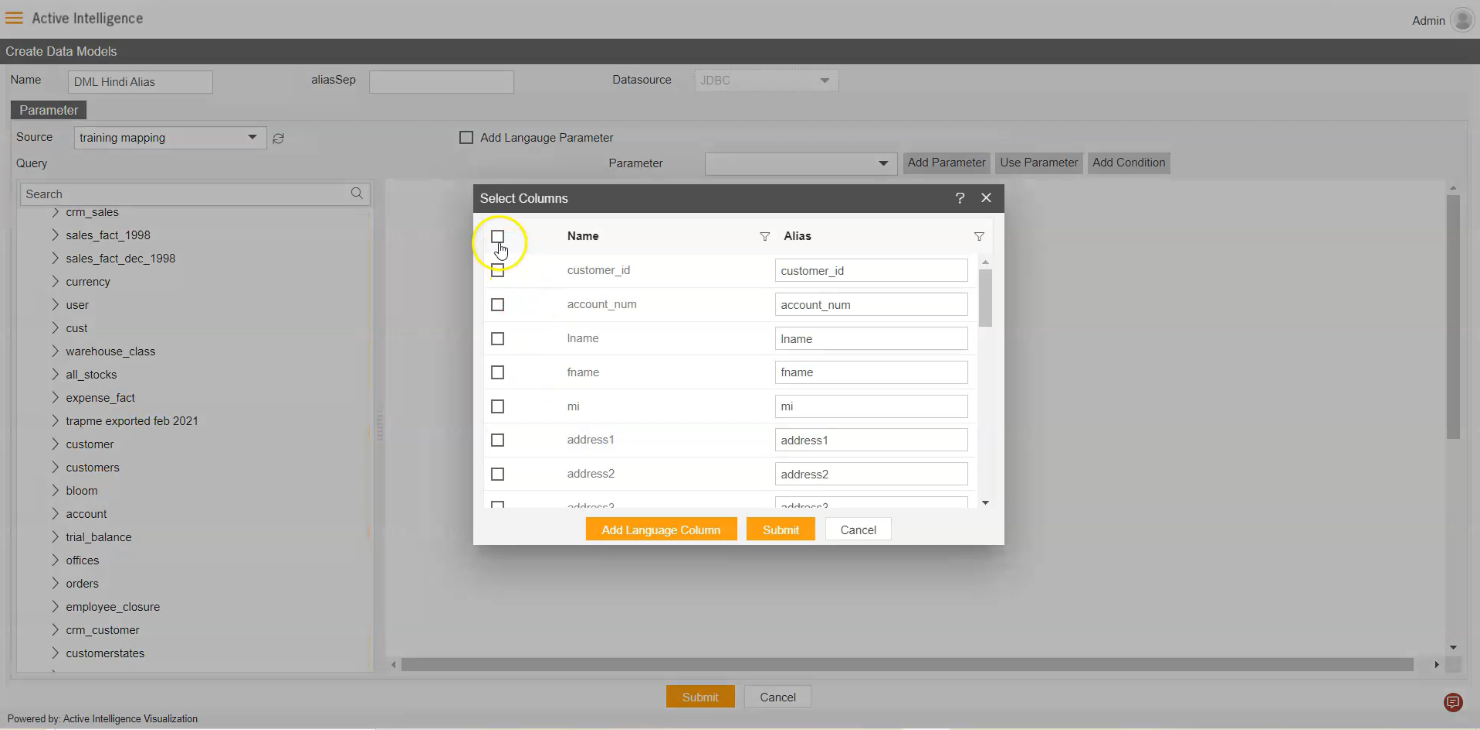
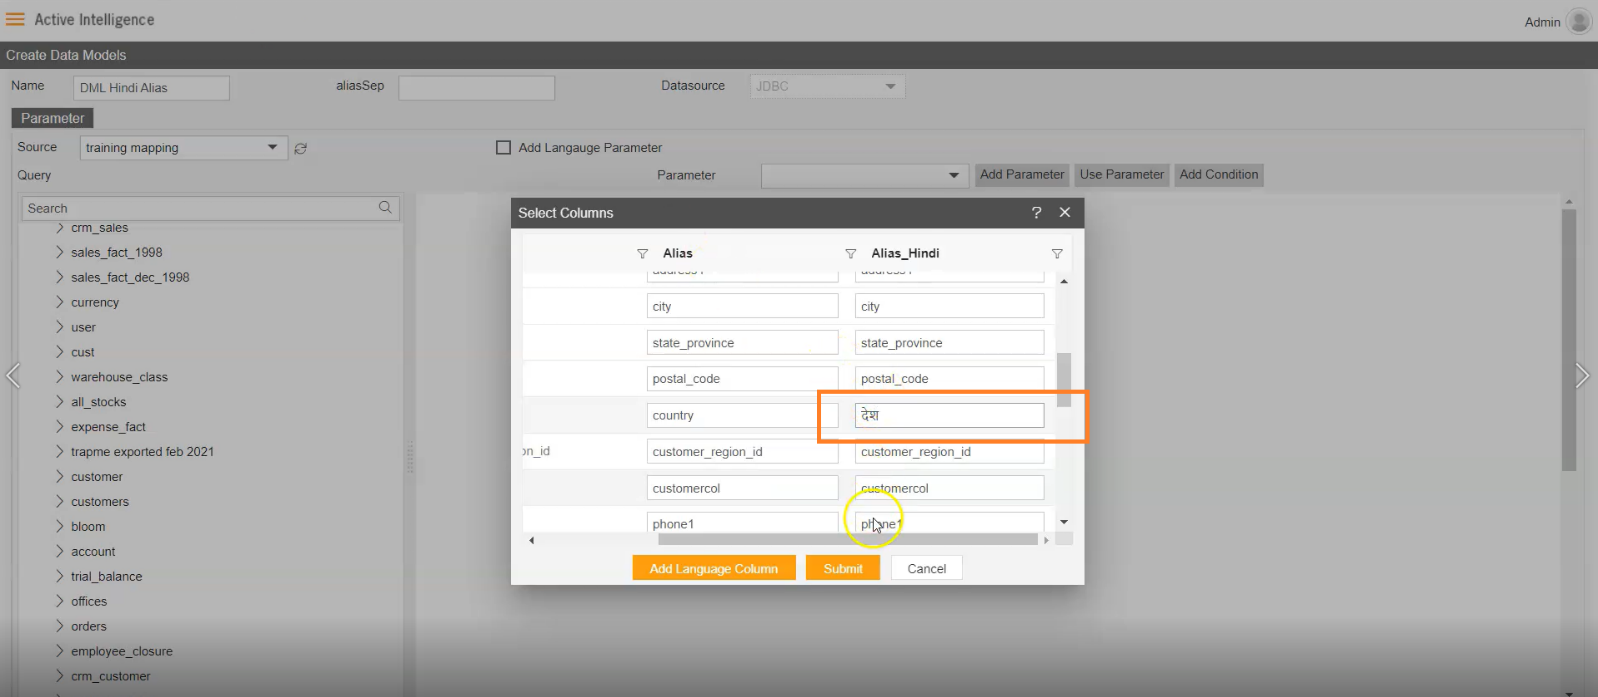
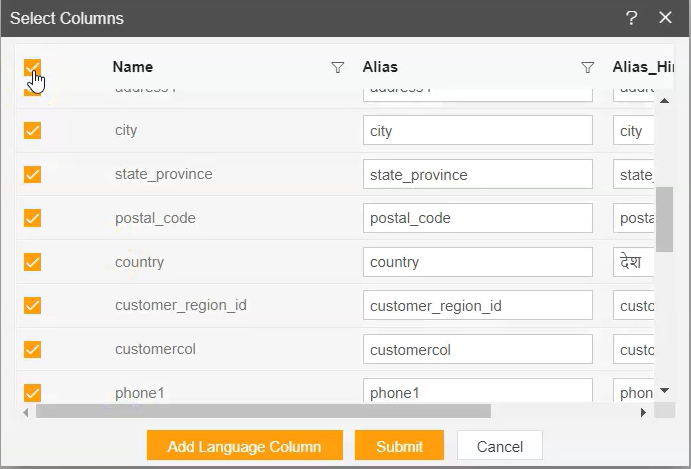
7. After adding the Language Column, it used to visible in the Select column dialog box, as Alias_Hindi, Add Custom Name of the column you want to add language in, as shown in figure below:
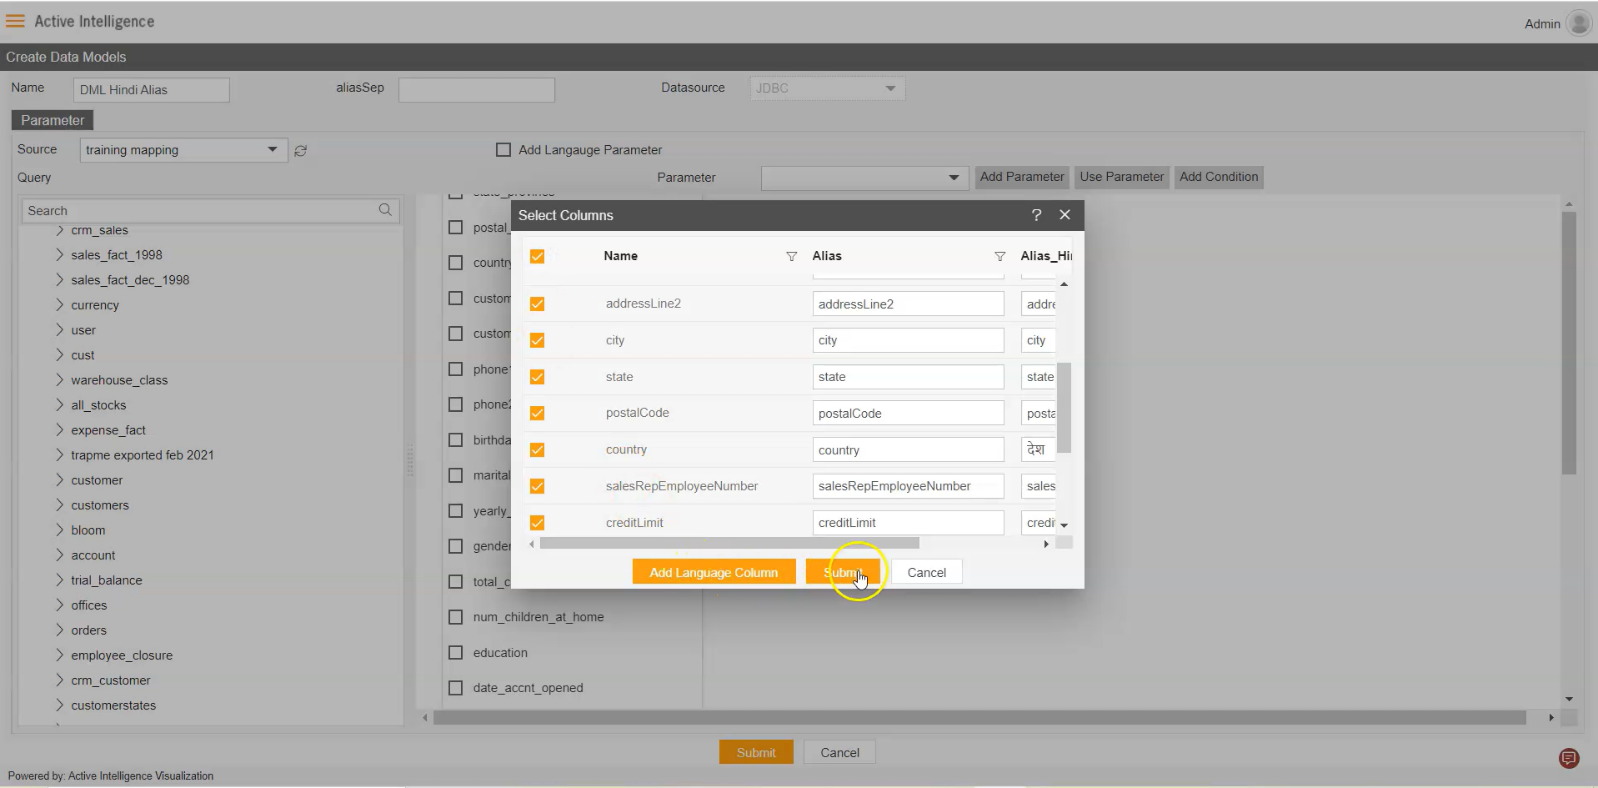
8. Select all columns and click on Submit button as shown in figure below:
9. Select and drag and drop the Customers table from the table list.
10. Add Language Column, as shown in figure below:
11. Add Custom name of the Alias Category Language as shown in figure below:
12. Add Custom name of the Alias as shown in figure below:
13. Select all the columns of the CUSTOMERS table, click on save button, as shown in figure below:
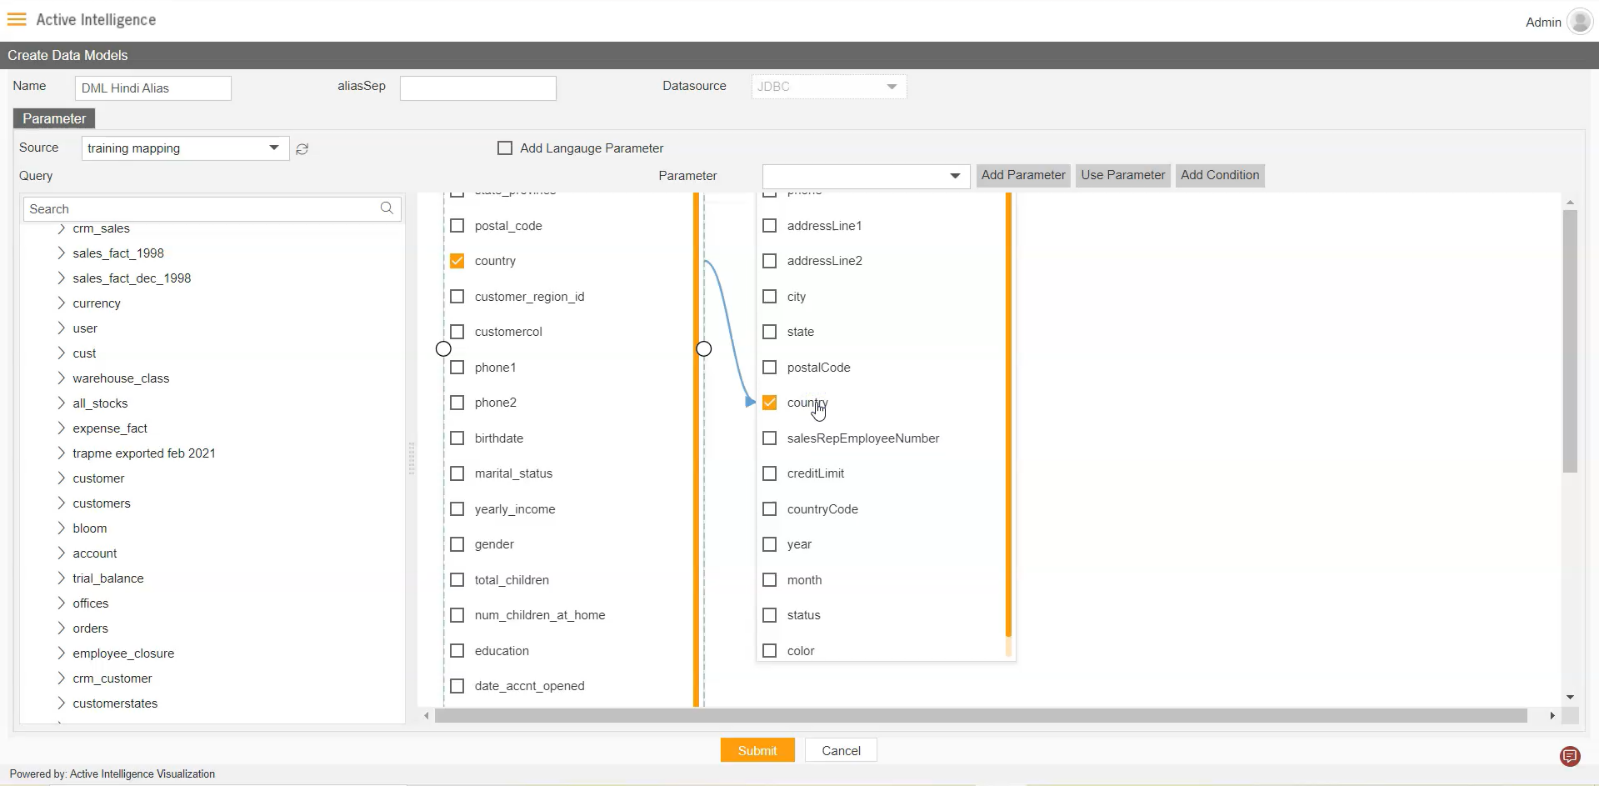
14. Drag the country column from CUSTOMER to CUSTOMERS table field, as shown in figure below:
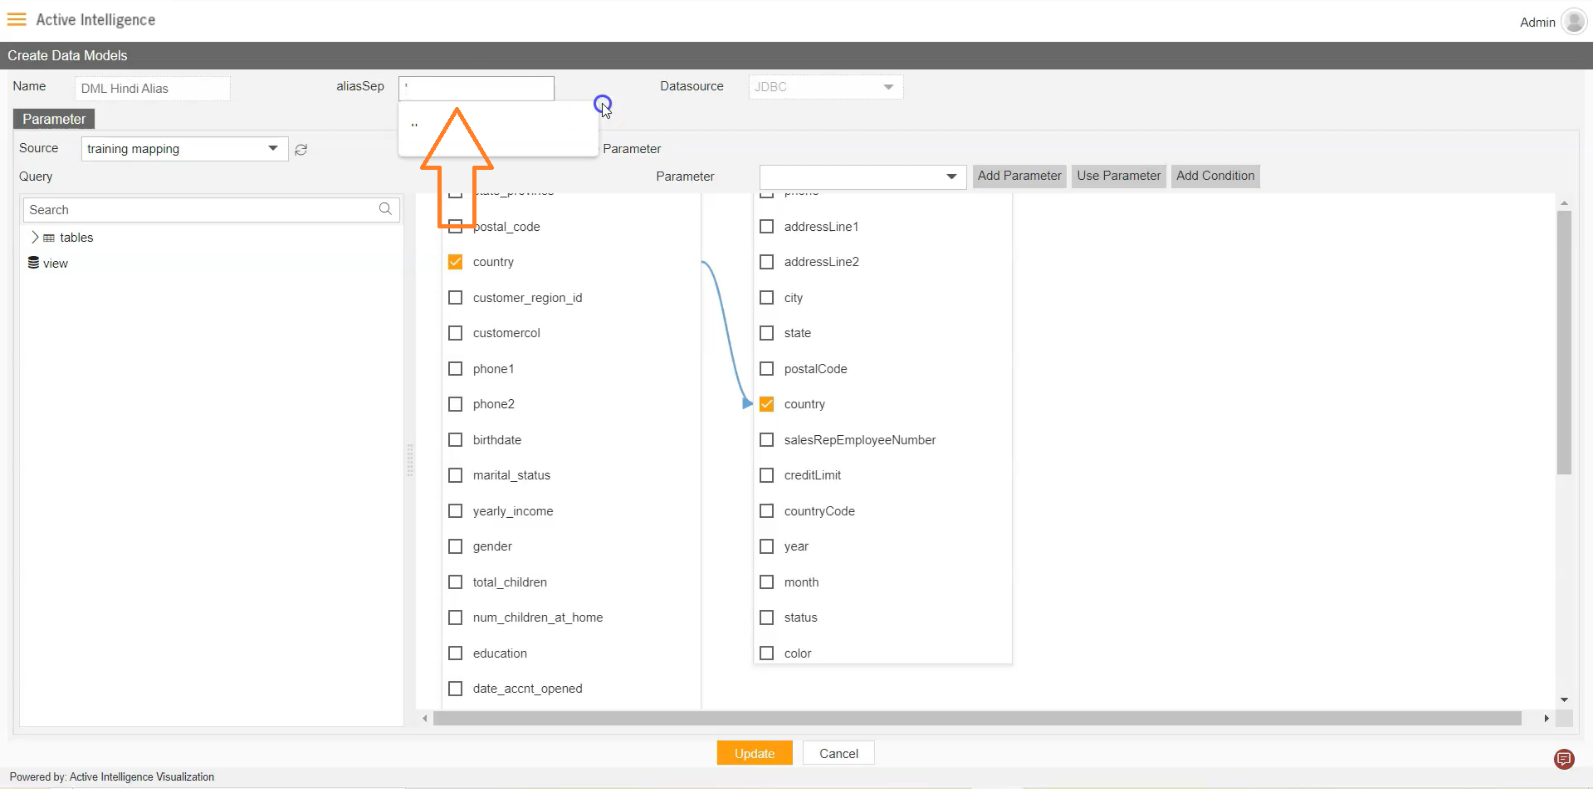
15. Add aliasSap as (‘), as shown in figure below:
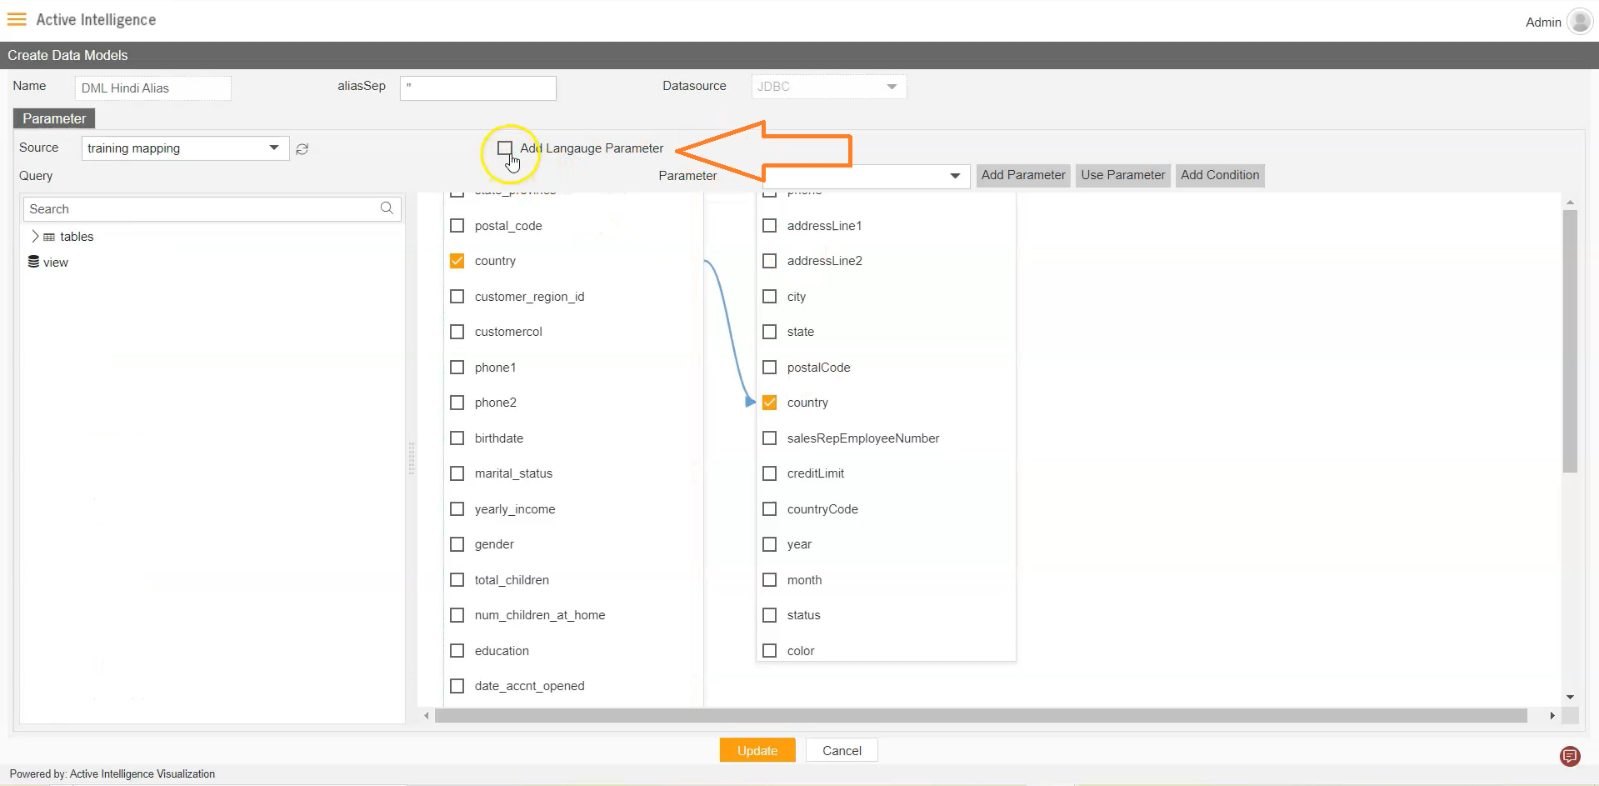
16. Enable the Add Language Parameter by clicking the following Checkbox as shown in figure.
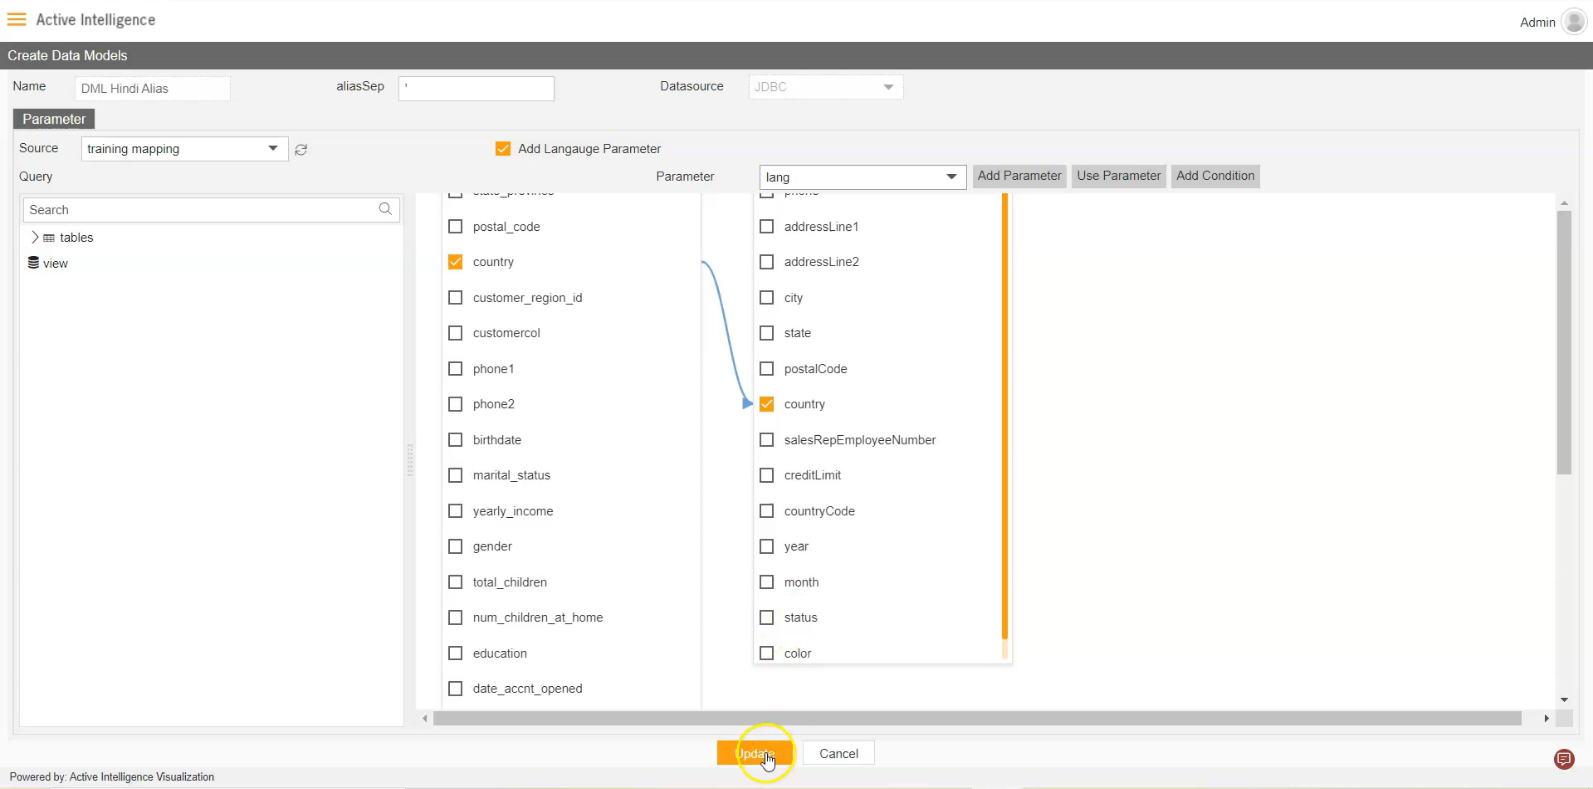
17. After enabling the button will look like the following figure.

18. Click on Submit button to complete the dataset.
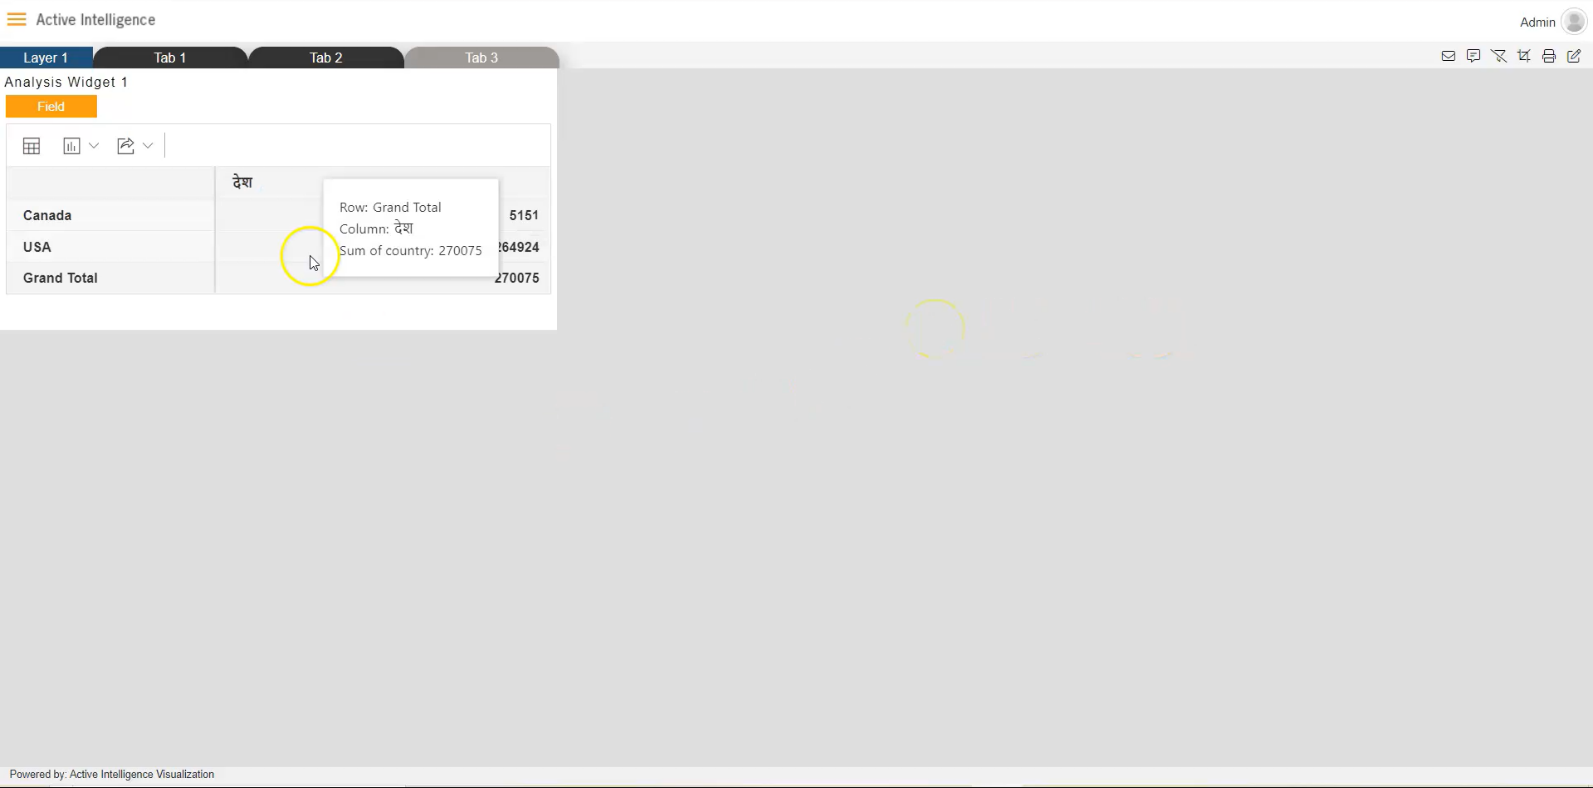
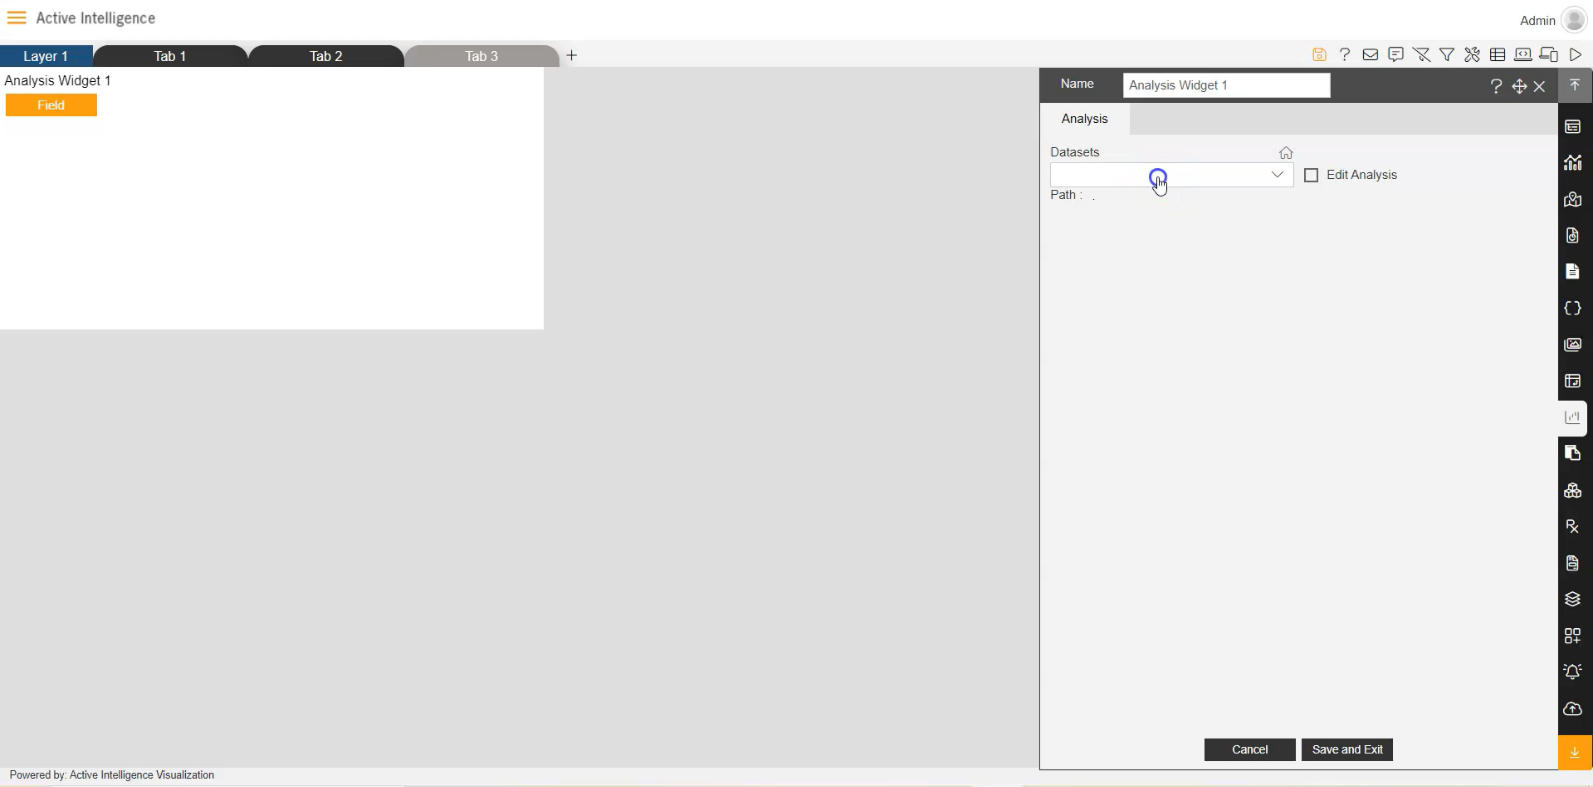
19. Go to Visualization section, add dashboard and click on Analysis icon to add widget into dashboard, as shown in figure.
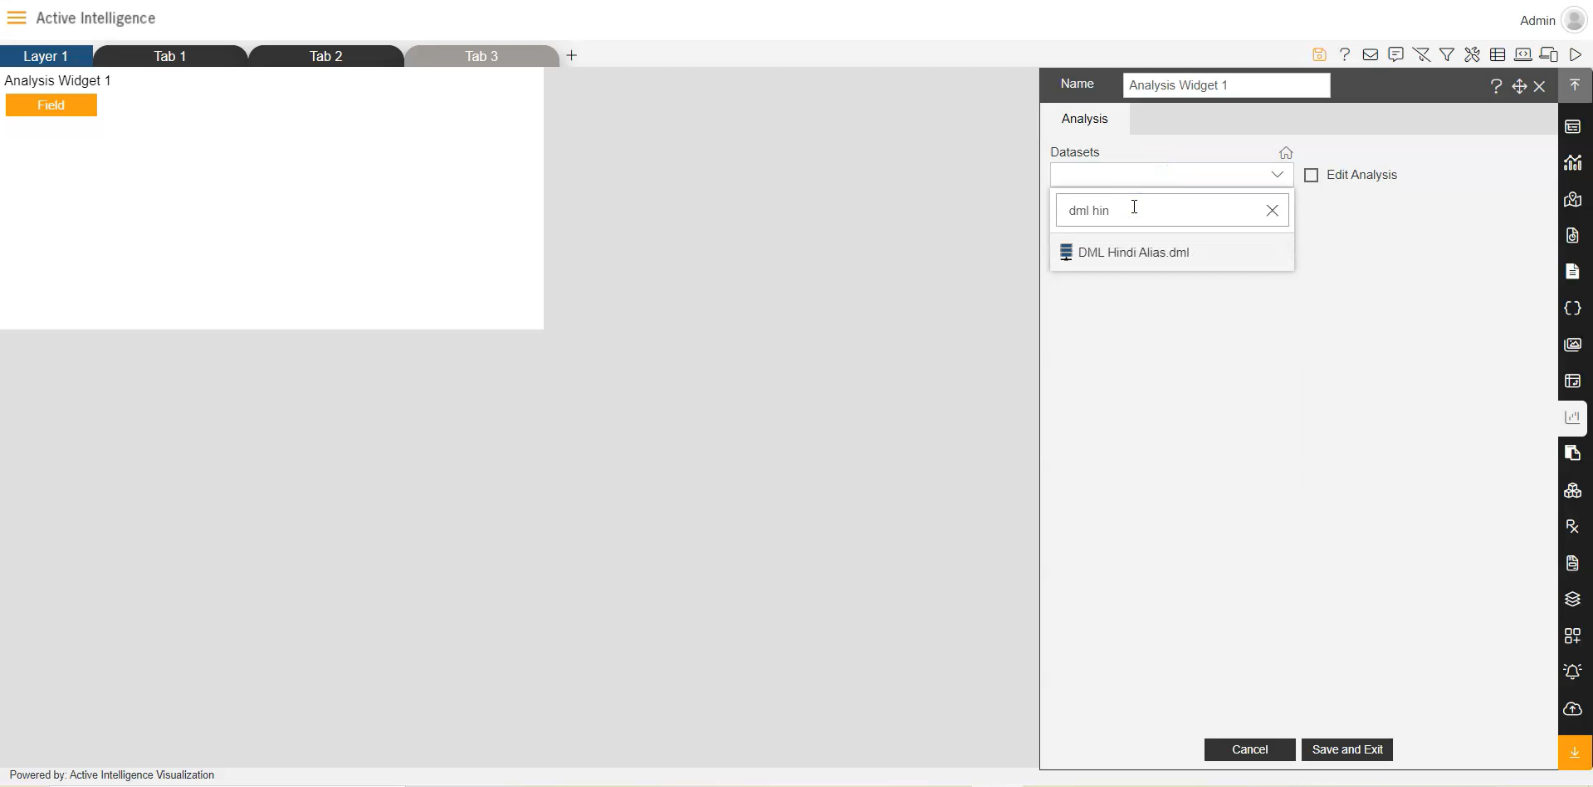
20. Select DML_Hindi Alias.dml dataset, as shown in figure below:
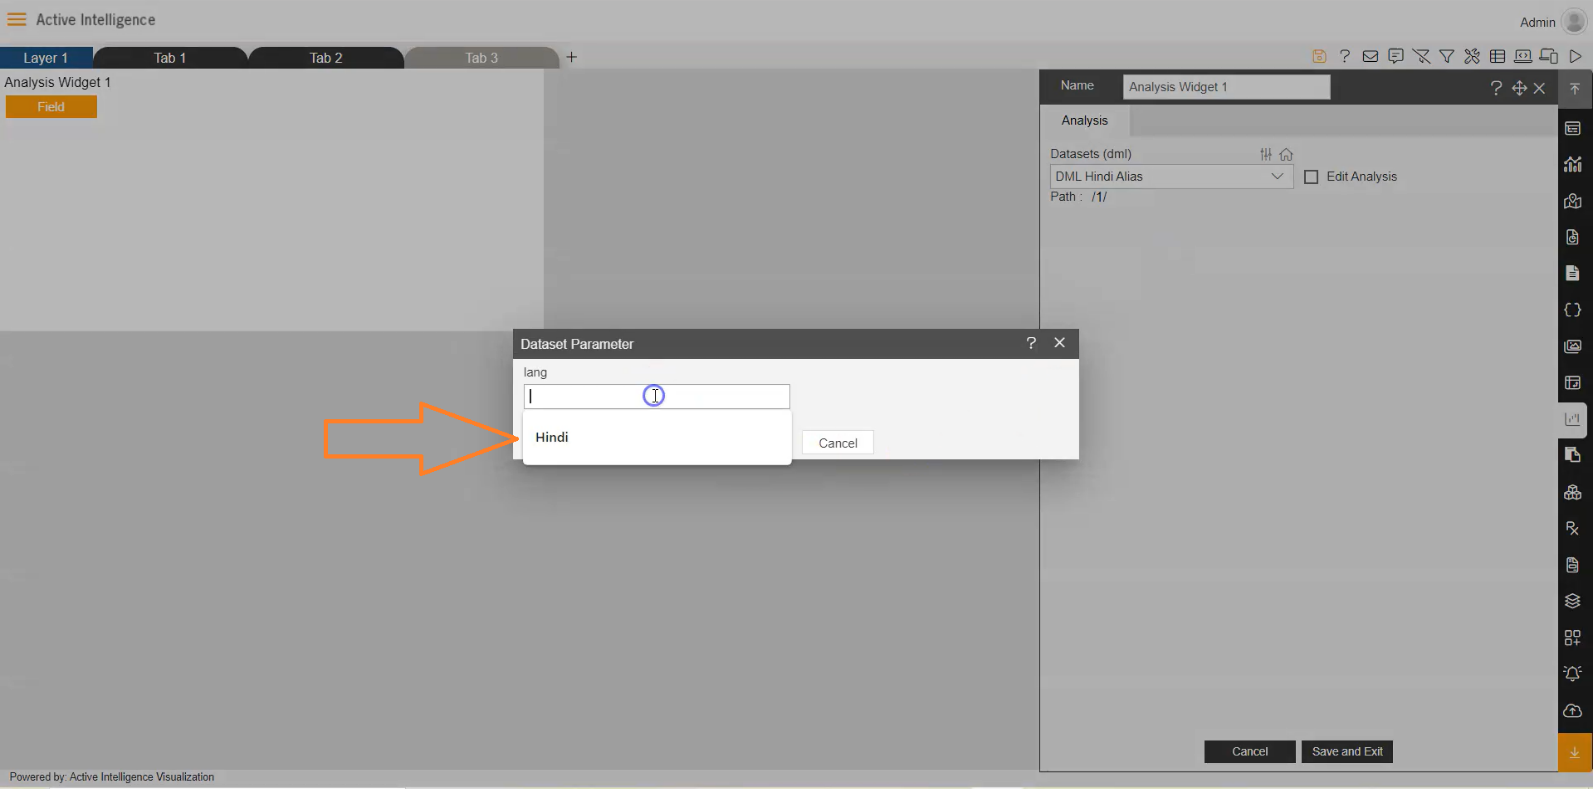
21. Select Parameter Lang as Hindi in Dataset Parameter, as shown in figure below:
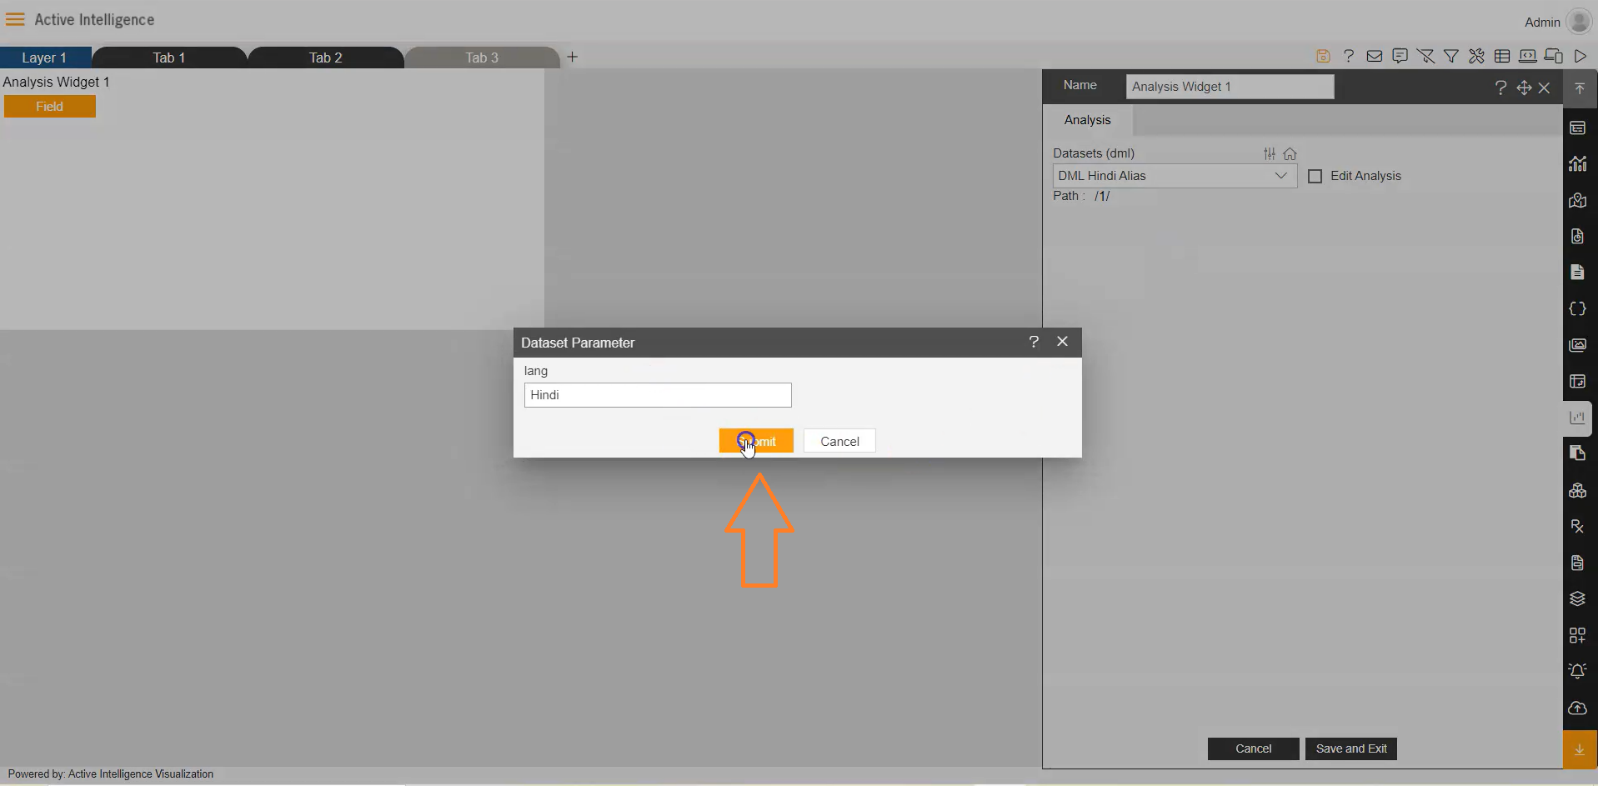
22. Click Submit button to complete the parameter selection, as shown in figure below:
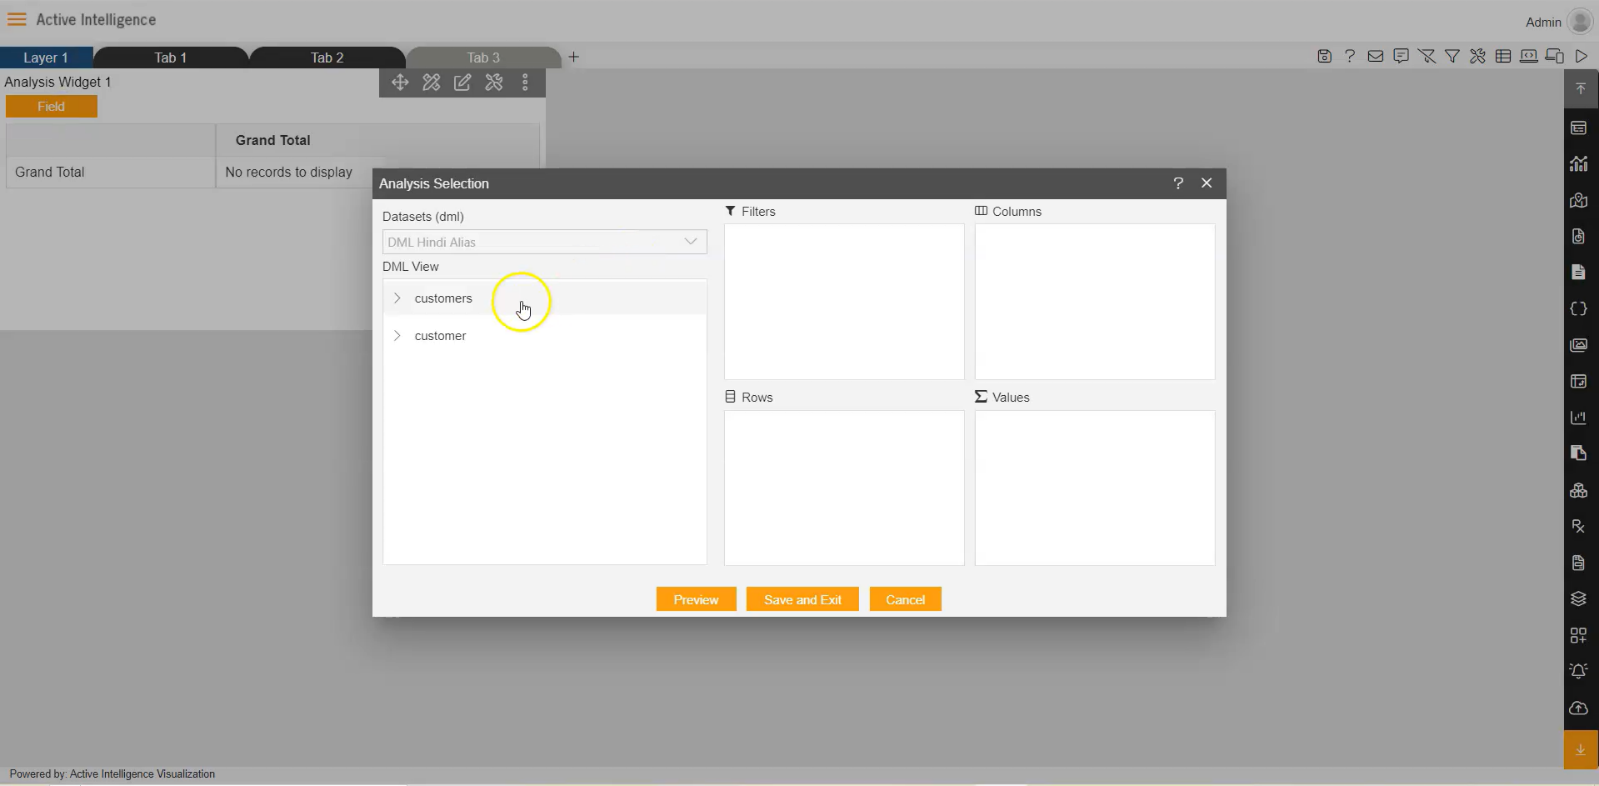
23. Click on Field button, to add Analysis Selection columns, as shown in figure below:
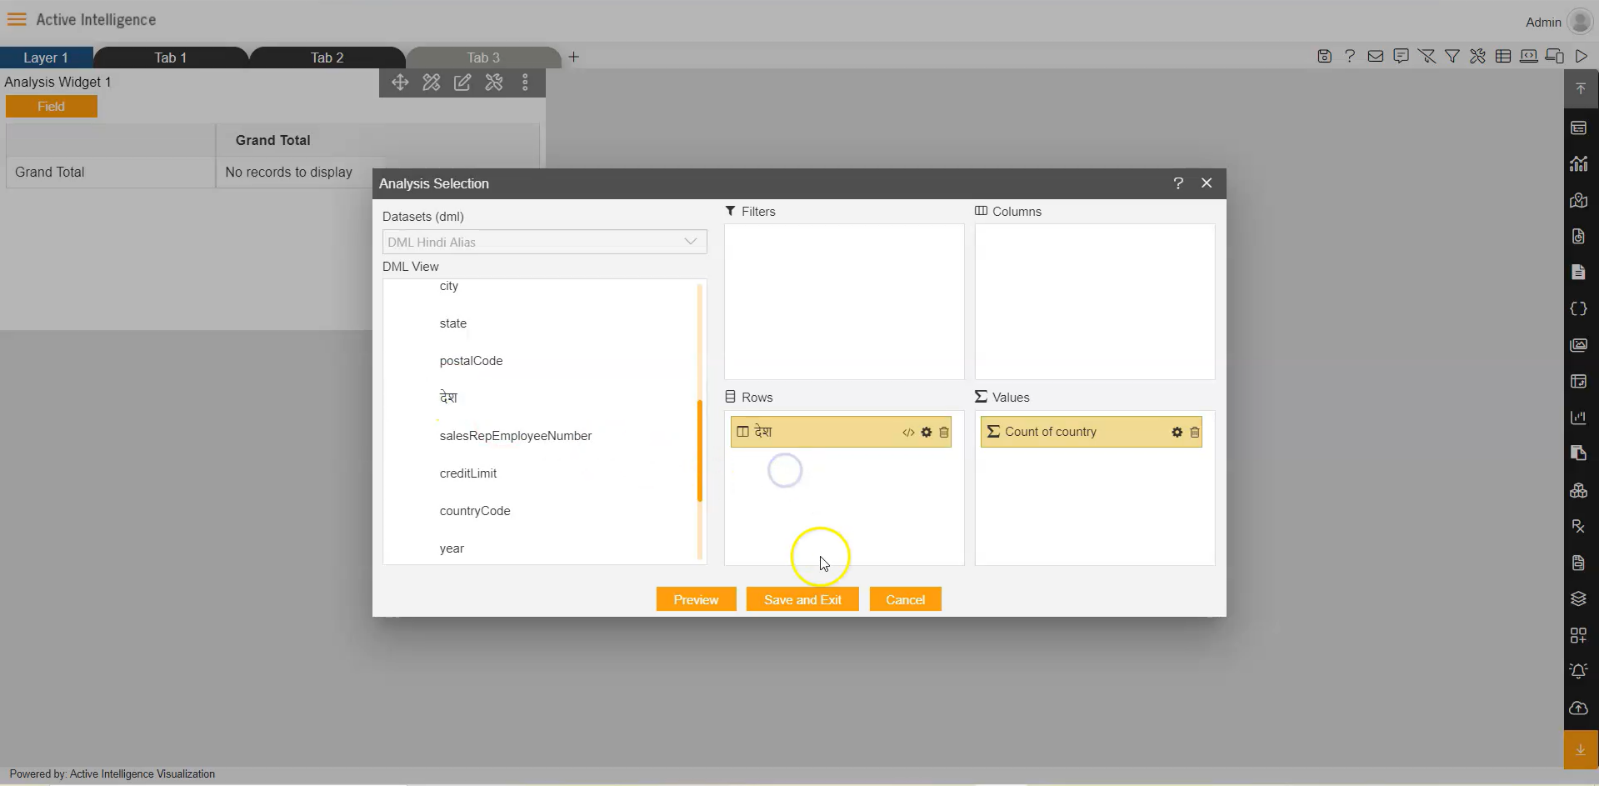
24. Extend the CUSTOMERS table, Drag and drop the custom added column in rows, as shown in figure below:
25. Click on Preview button, and click on Save and Exit button to complete the Analysis Widget.
26. Save the Widget in Dashboard and see the final output in Preview window by clicking Preview icon.