Creating Dataset using Excel

1. Click on Hamburger Icon.
2. Click on Documents Tab.
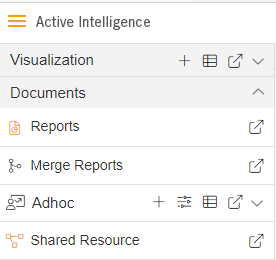
3. In Documents tab Click on Shared Resource.
4. In Shared Resource Click on upload, As shown in figure below:

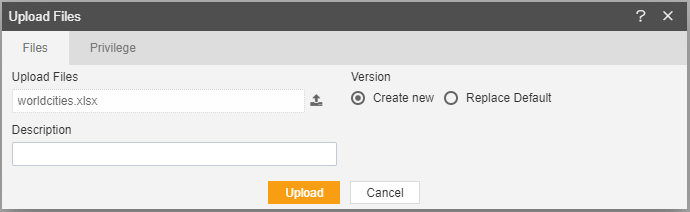
5. When you click on Upload it will display a screen.
6. In Upload Files upload a World Cities Excel file, As shown in figure below:
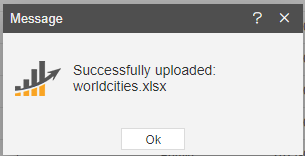
7. Click on Upload button
8. You will get a message, As shown in figure below:
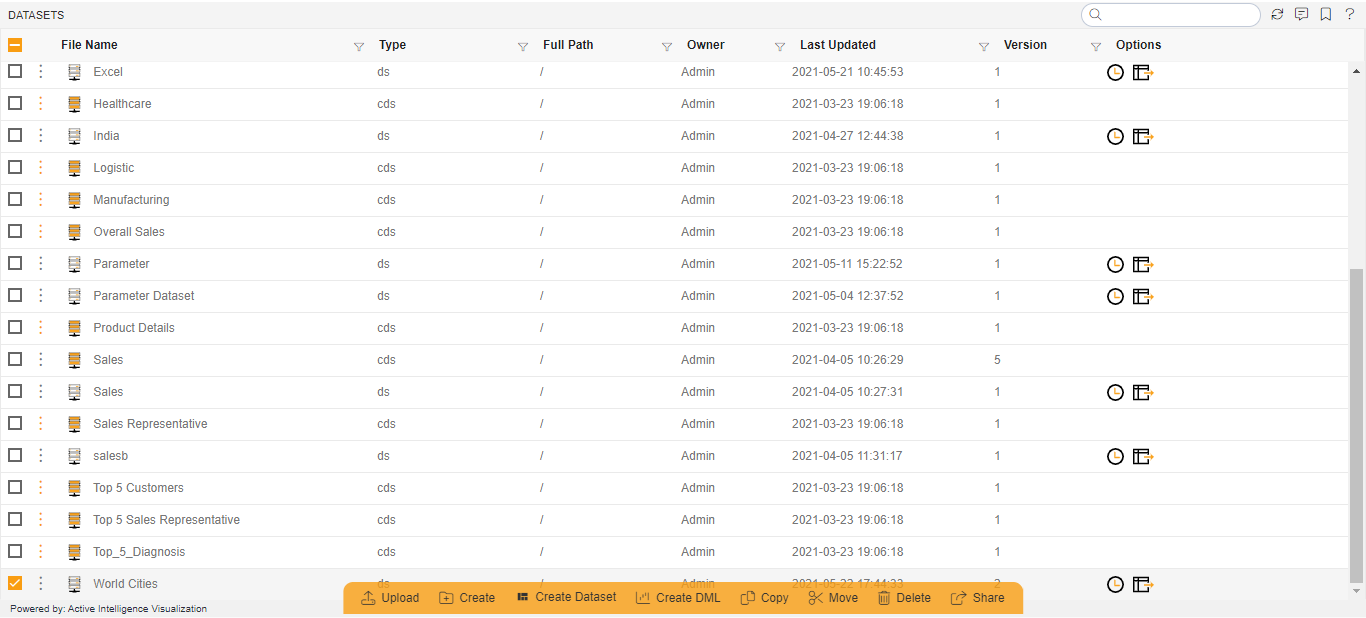
9. In Master Data Tab click on Dataset.
10. Click on create dataset, As shown in figure below:

11. Enter following details in Create Dataset.
Name: World Cities
Datasource: Existing Files
Select Excel Radio Button:
Select World Cities.ds file in Available to selected.
12. Fill above details, As shown in figure below:
13. Click on Preview and submit button.
14. You will see the World Cities.ds Dataset, As shown in figure below:
15. Click on visualization Tab and open Dashboard.
16. From Right Vertical Menu Select the Table Widget icon.
17. The Edit menu box appears as you click Table Widget icon. And a widget gets added in content place automatically in dashboard.
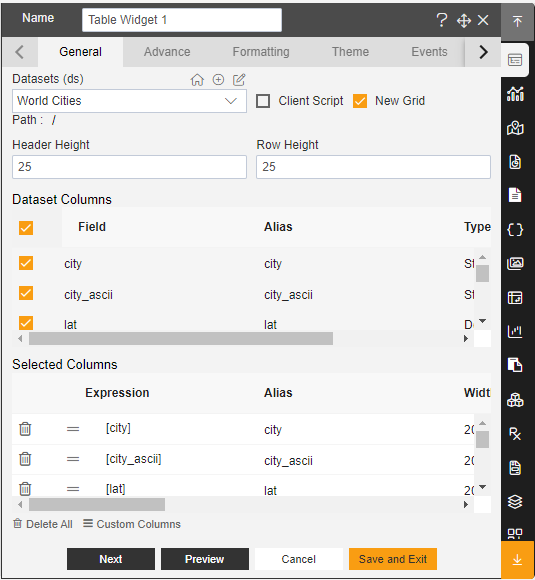
18. Enter Following Details in edit box, As shown in figure below:
Dataset: World Cities.ds
Select all the Field in Dataset Column.
19. Fill above details, As shown in figure below:
20. Click on Preview and Save and Exit.
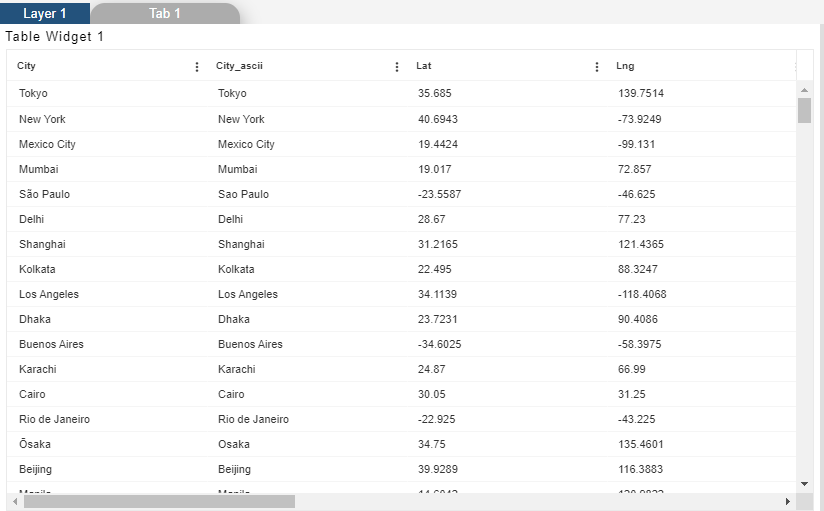
21. Now, match your Table Widget with the below example, it should look like the figure below:
In this manner, you can create a new dataset for your datasource.