Event based scheduling of Reports in the AIVHUB application
1. Click on Hamburger Icon.
2. Click on Documents and Click on Reports.
3. We will be using Customers details.rptdesign in the report section.
4. Double click on the report Customers details.
5. Go to the schedule tab as shown in the figure above. By default, Time will be selected hence select schedule type Event from the drop-down menu.
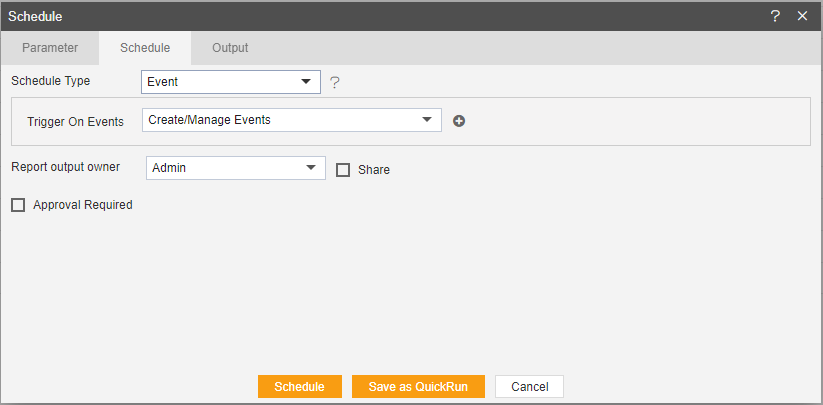
6. Trigger on Events define events on the trigger of which report will be scheduled.

7. Currently event 1 has been created for this example, you can create an event of your own by clicking on  which will open the following dialog box, As shown in figure below:
8. Here we have created event numbered two which is an event related to Report as mentioned in Event Type.
9. You can provide optional description of event as shown below.
10. You can also send an email to different users when event is fired.
11. For this check on event mail and enter following details.
Enter Users or Roles from the dropdown.
Enter the email address of the user who you want to send the email.
Select the template from dropdown, Default for our case and hit Submit.
12. Fill above details, As shown in figure below:

13. If you want some external event to fire, click on the  which will guide you regarding necessary steps to perform the same.
14. Now you have successfully created an event which will be visible in the dropdown as shown in figure below:
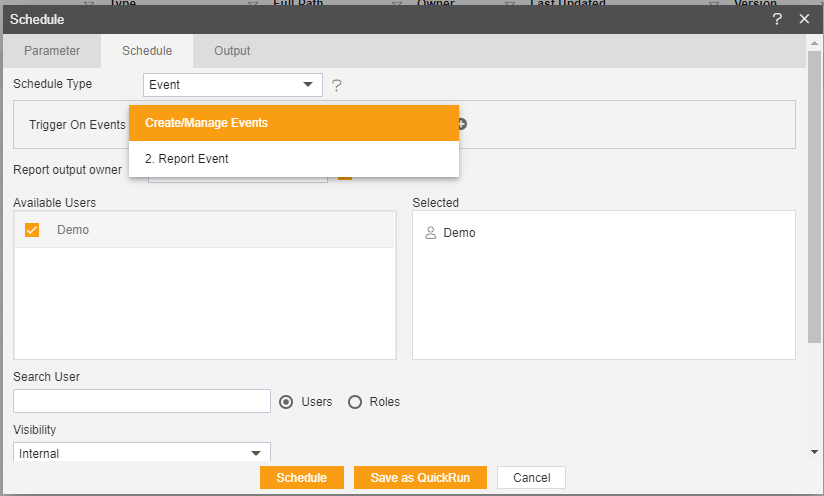
15. We will use event 2 for our example so select event 2.
16. Click on Share in case you want to share the report with other users or user roles.
17. Here the Visibility is kept Internal for this example.
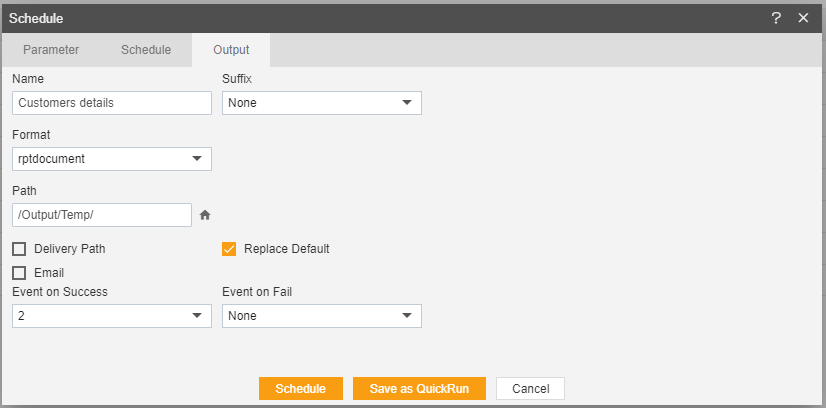
18. If you want you report to be approved before sending to other users, then check Approval Require.
19. Send Reminder specifies how many reminders should be sent.
20. After days specifies after how many days should the Reminder be sent again.
21. Approved by specifies the user’s name, which is Admin in our case.
22. You can also specify how many times the report should re-execute in case of failure and the interval from the drop-down menu shown in the figure. For instance, in our case the report will be executed twice in case of failure within duration of 5 minutes.
23. In order to specify the output, go to the output tab as shown in figure below:
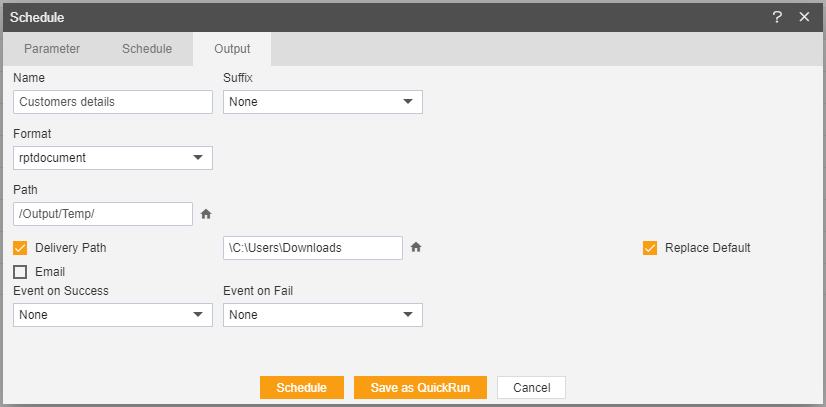
24. The user can also send the report as email to the other users using following steps:
25. Select the users and the roles from the drop-down menu.
26. Enter your email address/addresses to which you want to send the report via email.
27. Select a template from the dropdown, we have selected the Default template for our example, As shown in figure below:

28. Click on Schedule icon  in order to schedule the report.
29. In case of any further help, the user can click on the  icon to access the AIVHUB help documents.
30. If the user is not satisfied and wants to cancel the upload request, he can do this by clicking on the cancel button next to upload or by clicking on  button next to the icon.
31. The report is scheduled and you can check that in Requests section Request’s tab, go to Waiting for event which shows where the report is waiting for the event to trigger.
32. You can trigger an event with another report as follow:
33. Here we schedule a report named Event Trigger which will trigger event 2 when run successfully. After this event is triggered, our Employee report will be executed.
34. In this manner, you can schedule your reports based on trigger of events.
In this manner, you can schedule your reports based on trigger of events